Cutting Aluminum With a Miter Saw – Pro Tips and Tricks
Have you ever had aluminum that needed cutting? Maybe you tried with an angle grinder, but the cuts didn’t come out the way you wanted. In this article, we’ll take a look at the art of using a miter saw to cut aluminum. This is no ordinary DIY endeavor; it’s a precision craft, and the saw is your secret weapon.
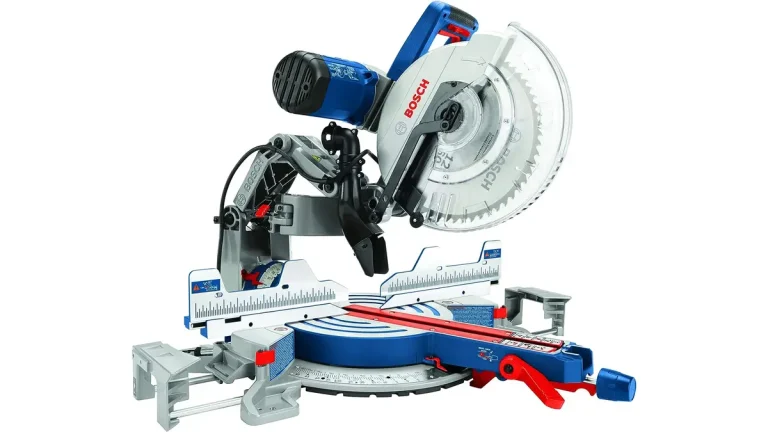
Picture this: you have a piece of aluminum that needs to be transformed into a perfectly angled trim for your project, or perhaps you’re crafting intricate aluminum frames for your artwork. That’s where the miter saw steps into the spotlight. This versatile power tool, primarily designed for cutting wood, can be your go-to tool for aluminum cutting with a few adjustments.
Intrigued? Great! It’s time to unravel the mysteries of cutting aluminum with a miter saw, explore the techniques, safety measures, and unleash the creative possibilities that come with it. So, if you’re itching to turn your aluminum dreams into reality, keep reading to discover the magic of this versatile tool in action!
Choosing the Right Saw Blade for Cutting Aluminum
One of the most common questions we hear is “Can you cut aluminum with a wood blade?”
The short answer is yes, you can cut aluminum with a wood cutting blade. However, it’s not ideal and will likely lead to tear-out, rough cuts, and a shorter blade life. For clean, smooth cuts in aluminum, you’ll want to use a blade specifically designed for non-ferrous metals like aluminum.
When cutting aluminum with a miter saw, there are a few things to keep in mind when selecting the right blade:
- Tooth Count – Look for a blade with at least 60 teeth. More teeth help produce a smoother cut. An 80-tooth blade is ideal for aluminum.
- Tooth Geometry – Alternating top bevel teeth work best to slice cleanly through aluminum. Triple chip grinds also work well. Avoid flat top teeth, which can cause vibration and tear-out.
- Coatings – Non-stick Teflon or titanium coatings reduce aluminum build-up on the blade. This prevents clogging and overheating.
- Materials – Carbide is the most common and durable material for aluminum cutting blades. It maintains its sharp edge longer than high-speed steel blades.
- Speed – Check that the blade’s max RPM matches your miter saw’s speed. Most miter saws run between 3000-5000 RPM. Faster blade speeds yield better cuts in aluminum.
With the right blade, cutting aluminum on a miter saw is easy.
Understanding the Types of Blades for Cutting Aluminum
When shopping for an aluminum cutting blade, you’ll come across a few main types:
- Non-Ferrous Metal Blades – Designed specifically for cutting non-ferrous metals like aluminum, brass, and copper. Usually have a high tooth count and Teflon coating.
- Multi-Purpose Blades – Can cut both wood and non-ferrous metals reasonably well. The teeth geometry is a compromise between wood and metal cutting.
- Carbide Tipped Blades – Very durable with carbide tips brazed to the blade. Maintain a sharp edge even when cutting abrasive metals. More expensive but long-lasting.
- Thin Kerf Blades – Have narrower kerf (the width of the cut) which reduces material waste. However, not as rigid so mostly used for wood rather than metal cutting.
- Circular Saw Blades – Can be mounted on a miter saw but are really intended for handheld circular saws. Usually have fewer teeth so not ideal for aluminum.
Selecting the Right Blade for Your Miter Saw
Once you understand the types of blades, consider these factors to select the right model for your miter saw:
- Miter Saw Max RPM – Match the blade speed to your saw’s max RPM.
- Blade Diameter – 10 or 12-inch diameter blades are the most common sizes that fit miter saws.
- Arbor Size – Ensure the arbor hole matches the miter saw arbor size (usually 5/8 or 1 inch).
- Tooth Count – Higher tooth counts of 80+ teeth optimize aluminum cutting.
- Desired Cuts – Consider the type of aluminum cuts you’ll make most often. Thicker aluminum may require a blade with lower TPI.
- Budget – Carbide tipped blades provide the best cuts but cost more than high-speed steel.
With the correct saw blade to cut aluminum, you’ll be able to cleanly make the cut.
Preparing the Workpiece You Need to Cut
Proper preparation of the aluminum workpiece is key to achieving accurate, clean cuts when using a miter saw. Follow these tips before making your cuts.
Measuring and Marking the Aluminum
- Use a steel measuring tape rather than a cloth measuring tape which can stretch.
- For longer pieces, use an aluminum square to mark precise 90 degree cuts.
- A fine tip permanent marker works best for marking cut lines on aluminum.
- If the aluminum has a reflective finish, scuff the surface before marking to help the ink stick.
- Don’t press hard when marking which can dent the soft aluminum surface.
Securing the Aluminum for Stability
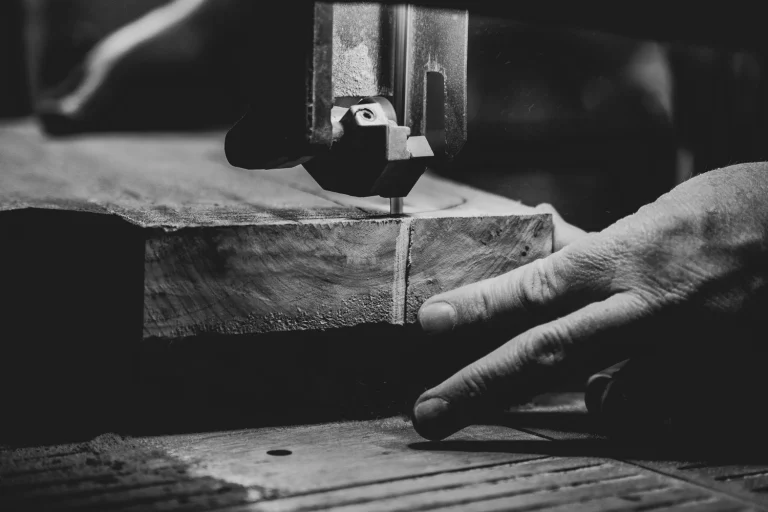
- Clamp the aluminum to the miter saw table or a stop block to prevent movement.
- Position your body to keep the aluminum piece stationary as you cut.
- For long or large pieces, consider using an outfeed support stand for stability.
- Use extra supports or sawhorses to minimize vibration when cutting.
- Wear gloves to ensure a firm grip on the aluminum during the cut.
Following precise measuring techniques and securing the aluminum properly will result in accurate cuts. Rushing through the prep work can lead to mistakes, so working carefully is time well spent.
Techniques for Cutting Aluminum With a Miter Saw
Once you have a sharp blade installed and your aluminum workpiece prepped, it’s time to make the actual cuts. Follow these tips for smooth, safe aluminum cutting with a miter saw:
Safety Precautions for Cutting Aluminum
- Wear eye protection – safety glasses or a face shield to prevent flying debris.
- Use hearing protection like ear muffs or plugs due to the high-pitched cutting noise.
- Wear a dust mask or respirator to avoid inhaling fine aluminum particles.
- Keep your hands at a safe distance from the blade when cutting. Don’t reach past the workpiece.
- Allow the blade to come to a complete stop before raising it after a cut.
Applying Proper Technique for Smooth Cuts
- Make multiple light passes rather than trying to cut all the way through in one pass.
- Depending on the thickness of the aluminum, you may need to allow the blade teeth to score it before applying downward pressure.
- Feed the aluminum slowly and evenly into the blade at a controlled rate.
- Support the aluminum on both sides of the blade to prevent vibration or movement.
- Use a wood block against the fence when cutting small pieces for leverage.
- Clean any aluminum buildup off the blade periodically for best performance.
With sharp blades, secure workpieces, and safe cutting techniques, you’ll achieve burr-free cuts in aluminum on your miter saw.
Common Mistakes to Avoid When Aluminum Cutting
Cutting aluminum on a miter saw is not without its challenges. Avoid these common mistakes for the best results:
Overheating the Blade
- Cutting too aggressively can overheat the blade causing discoloration of the aluminum.
- Allow the blade to cool periodically by cutting more slowly or pausing between cuts.
- Make sure the max RPM of the blade matches the saw speed to reduce friction.
Using the Wrong Saw for the Job
- Don’t try to cut thick aluminum with a basic miter saw. Use a metal chop saw instead.
- Attempting angled cuts on a non-sliding saw can bind the blade. Upgrade to a sliding compound miter saw for beveled aluminum cuts.
Not Using a Guide Fence
- The aluminum can vibrate if not flush against a guide fence while cutting.
- Position the fence close to the aluminum to provide rigid support.
- For shorter pieces, use a wood block against the fence to prevent tear out.
Avoiding these pitfalls will help you succeed in your aluminum cutting.
Pro Tips for Cutting Aluminum
Take your aluminum cutting to the next level with these pro tips:
Using Lubrication for Better Results
- Apply a light coat of silicone spray or wax to the aluminum before cutting. This reduces friction and chip buildup.
- Alternatively, you can rub a paraffin candle stick along the cut line to lubricate the aluminum surface.
- The lubrication helps the blade teeth move smoothly through the aluminum.
Clamping Techniques for Precise Cuts
- Use stop blocks clamped to the miter saw fence to ensure all cuts are exactly the same length.
- Position roller stands near the saw to support long aluminum pieces for straight cuts.
- Use corner clamps or vise clamps to hold multiple pieces together when cutting miters.
- Clamp a guide with the desired angle to the saw table to easily replicate angled cuts.
Employing these pro tips will take your miter saw aluminum cutting skills to the next level.
Final Thoughts
Cutting aluminum with a miter saw may seem daunting at first. However, with the right preparation, metal cutting blades, safety precautions, and techniques, you can achieve professional-quality results.
Invest in a quality aluminum cutting blade, properly secure your workpiece, and work slowly to allow the blade teeth to gradually slice through the aluminum.
Employ lubrication methods for smooth feeding and leverage clamps and stops blocks to minimize vibration.
Follow safety best practices like wearing eye protection and avoiding contact with the spinning blade.
With practice and the tips outlined above, you’ll be able to cut aluminum pieces with precise miters and bevels using your miter saw.
The end result will be burr-free cuts that require little-to-no secondary finishing.
Master aluminum cutting on a miter saw and take your metalworking skills to exciting new levels.