How to Sand Drywall Without Making a Mess
Welcome to our informative guide on how to sand drywall! If you’ve ever wondered how professionals achieve those flawlessly smooth walls, you’re in the right place. Sanding drywall is a crucial step in any renovation or repair project, and with a little know-how and the right tools, you too can achieve a polished finish that will impress everyone.
In this article, we will walk you through the step-by-step process of sanding drywall like a pro. No prior experience is necessary; our easy-to-follow instructions are tailored to an 8th-grade reading level, making it accessible for DIY enthusiasts of all ages.
We’ll start by covering the essential tools and materials you’ll need to get the job done right. From there, we’ll guide you through the proper techniques for sanding, ensuring you achieve a smooth surface without damaging the drywall. We’ll even share some handy tips for managing dust and minimizing cleanup.
So, let’s get started on your journey to transforming your walls from ordinary to extraordinary with our comprehensive guide on the way to sand drywall!
Necessary Tools and Materials
To achieve a smooth and professional finish while sanding drywall, you’ll need the right tools and materials at your disposal. Here’s a list of essential items to make your drywall sanding project a success:
- Sanding Sponge or Sanding Pole: For small and localized areas of drywall, a hand sander or sanding sponge works wonders. It’s a handheld tool with an abrasive surface that allows you to sand with precision. Alternatively, a sanding pole, also known as a pole sander, is ideal for larger surfaces and high or hard-to-reach areas. It attaches to sandpaper sheets and provides better leverage.
- Sandpaper: Selecting the right sandpaper is crucial for effective drywall sanding. For initial sanding or removing excess joint compound, opt for a coarse grit sandpaper, around 80 or 100. For smoothing and final touches, switch to a fine grit sandpaper, such as 120 or 150.
- Drywall Joint Compound: Before sanding, you might need to apply drywall joint compound to fill gaps, seams, or imperfections. Allow the compound to dry thoroughly before proceeding to sand.
- Sanding Block: A sanding block is useful for holding the sandpaper and providing an even surface for sanding. It can be used with both regular sandpaper sheets and sanding screens.
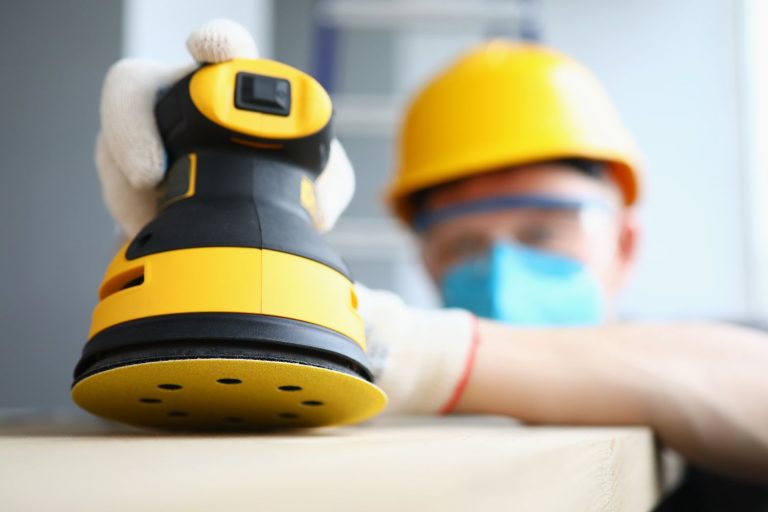
- Dust Mask: Safety should always be a top priority during sanding. Wearing a dust mask protects your lungs from inhaling fine dust particles, which can be hazardous to your health.
- Safety Goggles: Shielding your eyes with safety goggles prevents dust or debris from getting into your eyes during sanding, ensuring a safe and comfortable experience.
- Drop Cloths or Plastic Sheeting: To keep your workspace clean and minimize cleanup afterward, lay down drop cloths or plastic sheeting to catch dust and debris.
- Vacuum or Shop Vac: Having a vacuum or a shop vac nearby helps in cleaning up dust as you work, preventing it from spreading throughout your home.
With these essential tools and safety equipment, you’re well-prepared to sand your drywall efficiently and safely. Make sure to follow the manufacturer’s guidelines for each tool and maintain a clean and organized workspace to achieve the best results.
Preparing to Sand Drywall
Before you begin the drywall sanding process, it’s essential to prepare your workspace adequately. Proper preparation ensures smoother sanding and minimizes the mess afterward. Here’s what you need to do:
- Clear the Area: Start by removing any furniture, fixtures, or objects from the room or area you plan to sand. Clearing the space gives you ample room to maneuver the sanding tools without the risk of bumping into obstacles or causing damage to your belongings.
- Protect Floors and Nearby Surfaces: Drywall sanding produces fine dust that can settle on floors and nearby surfaces, making cleanup a tedious task. To minimize the mess, cover the floors with drop cloths or plastic sheeting. Additionally, consider using painter’s tape to secure the edges of the coverings and keep them in place during sanding.
- Cover Electrical Outlets and Fixtures: Use painter’s tape or plastic wrap to cover electrical outlets, light switches, and fixtures. This step prevents dust from entering these areas and avoids potential electrical hazards.
- Ventilate the Area: Proper ventilation is essential during sanding to help disperse the dust and maintain good air quality. If possible, open windows and doors to allow fresh air to circulate. If sanding a room without windows, consider using fans or an air purifier to improve ventilation.
- Wear Protective Gear: Always wear safety equipment while sanding drywall. A dust mask is crucial to protect your lungs from inhaling fine particles, and safety goggles shield your eyes from dust and debris.
- Organize Your Tools: Before you start sanding, gather all the necessary tools and materials in one place. Having everything within reach saves time and ensures a smooth sanding process.
Taking the time to prepare your workspace properly sets the stage for a successful drywall sanding project. A clear and organized area allows you to focus on the task at hand and achieve a professional finish. Additionally, covering floors and nearby surfaces helps to keep your home clean and makes post-sanding cleanup a breeze. Remember, safety and preparation go hand in hand, so make sure to wear the appropriate protective gear and follow the manufacturer’s instructions for your sanding tools. With a well-prepared workspace, you’ll be ready to tackle your drywall sanding project with confidence.

Choosing the Right Grit Sandpaper for Drywall Sanding
Selecting the right grit sandpaper is crucial for achieving a smooth and flawless finish while sanding drywall. Grit refers to the coarseness of the sandpaper, and different grit sizes serve specific purposes during the sanding process. Let’s explore the various grit sizes and their respective uses to help you make the best choice for your drywall sanding project.
Understanding Grit Sizes:
Low Grit (40 to 60): Coarse grits with lower numbers are best suited for heavy material removal and tackling rough surfaces. They are ideal for initial sanding on surfaces with stubborn imperfections, such as joint compound seams, ridges, or rough patches. However, be cautious when using low grits, as they can easily damage delicate drywall surfaces.
Medium Grit (80 to 120): Sandpapers with medium grits strike a balance between material removal and surface smoothing. They are excellent for general sanding tasks and leveling the surface after using low grit sandpaper. Medium grits are often used during the initial stages of sanding.
High Grit (150 to 220): Fine-grit sandpaper is used to create a smooth and polished finish on the surface of the drywall. It is used in the final sanding stages to remove any remaining scratches, marks, or imperfections left by the coarser grits. High grits leave the drywall surface ready for primer or painting.
Recommended Grits for Different Stages:
Initial Sanding: For the first sanding pass, especially if the drywall surface has significant imperfections or roughness, it’s best to start with a medium to low grit, around 80 to 100. This grit size helps level the surface and remove major blemishes effectively.
Intermediate Sanding: As you progress, switch to a medium grit, around 120, to further smooth the surface and prepare it for the final sanding.
Final Sanding: In the last stage, use a high grit, around 150 to 180, to achieve a fine finish. This grit size will eliminate any remaining scratches or marks and leave the drywall surface perfectly smooth and ready for finishing touches.
Remember, the key to achieving the best results is to progress from lower to higher grits gradually. Avoid skipping grits, as each one plays a vital role in refining the drywall surface. Also, ensure you follow the manufacturer’s guidelines for your sanding tools and use a light touch while sanding to avoid over-sanding. By choosing the right grit sandpaper and following these recommendations, you’ll achieve outstanding results and create a professionally finished drywall surface.

Starting the Dry Sanding Process
As you begin the sanding process for your drywall project, employing the right techniques is essential to achieve a smooth and even finish. Whether you’re using hand sanding methods or opting for a pole sander, following these techniques will help you achieve the desired results. Let’s explore the best techniques for both hand sanding and using a pole sander:
Hand Sanding Techniques
Circular Motions: When hand sanding, use circular motions to sand the drywall surface. This technique allows for even and consistent sanding, preventing noticeable sanding lines or uneven spots. Keep the sanding block or sandpaper flat against the drywall and maintain a steady circular motion.
Long Strokes: For longer sections of drywall, employ long, straight strokes along the length of the wall. Sanding with the grain of the drywall ensures a smoother surface and reduces the risk of creating cross-grain scratches.
Even Pressure: Apply even pressure while sanding to avoid damaging the drywall by over-sanding in one area and creating indentations. Let the sanding block or sandpaper do the work and avoid pressing too hard, especially on softer drywall surfaces.
Advantages of Using a Pole Sander
Reaching High Areas: A pole sander, also known as an extension sander, is an invaluable tool for sanding high or hard-to-reach areas, such as ceilings or upper corners. The extended pole allows you to reach these areas without the need for ladders or scaffolding, ensuring a safer sanding process.
Covering Larger Surface Areas: For broad surfaces, such as walls, a pole sander covers more area with each stroke, making the sanding process more efficient and less time-consuming.
Reducing Fatigue: Using a pole sander minimizes the need to crouch or bend, reducing strain on your back and knees during the sanding process. This is particularly beneficial for larger projects that require extended periods of sanding.
Remember to keep the sandpaper or sanding screen clean and replace it when it becomes worn or clogged with dust. Whether you choose hand sanding or a pole sander, consistency in your sanding technique is key to achieving a smooth and professional-looking finish. By following these techniques, you’ll be well on your way to transforming your drywall into a polished surface ready for the next steps in your project.

Managing Dust and Debris
Dust control is a crucial aspect of sanding drywall. The process generates a significant amount of fine dust and debris, which can be harmful to your health and create a mess in your workspace. Proper dust control not only ensures a safer environment but also leads to a more efficient sanding process and better results. Let’s explore the importance of dust control during sanding and provide you with tips on how to minimize airborne dust and clean up effectively.
Importance of Dust Control:
Health Concerns: Inhaling drywall dust can be harmful to your respiratory system, causing irritation and potential health issues, especially if you have allergies or respiratory conditions. Wearing a dust mask is vital to protect your lungs from inhaling the fine particles released during sanding.
Workplace Safety: Excessive dust on the floor can create a slippery surface, increasing the risk of accidents and falls. Proper dust control ensures a safer working environment for you and others around you.
Better Visibility: Dust buildup on the drywall surface can obscure imperfections, making it difficult to achieve a smooth finish. By managing dust, you maintain clear visibility of your sanding progress and identify areas that require further attention.
Tips to Minimize Airborne Dust:
Use a Dust Collection System: If your sanding equipment has a built-in dust collection bag or a shop vacuum attachment, use it. These systems are designed to capture and contain a significant amount of dust during sanding, minimizing airborne particles.
Work Outdoors (if possible): If your project allows it, consider sanding outdoors to reduce dust buildup inside your home. If not, choose a well-ventilated area with open windows and doors to improve air circulation.
Dampen the Drywall: Lightly dampen the drywall surface before sanding. This helps to weigh down the dust particles and reduces their ability to become airborne.
Dustless Sanding Techniques: Some modern sanders offer dustless sanding options that can be connected to a vacuum system for even better dust collection.
Effective Cleanup Tips:
Wait for Dust to Settle: After sanding, allow the dust to settle before attempting cleanup. This prevents dust from re-circulating in the air and resettling on the surfaces you’ve just cleaned.
Use a Shop Vac: A shop vacuum with a fine dust filter is an excellent tool for quick and efficient cleanup. Vacuum the work area and surrounding surfaces to capture as much dust as possible.
Wipe Down Surfaces: After vacuuming, wipe down the surfaces with a damp cloth to remove any remaining dust.
Dispose of Dust Properly: When emptying the vacuum or dust collection bag, do it outside to prevent dust from re-entering your living space.
By emphasizing dust control and following these cleanup tips, you’ll not only achieve better results in your drywall sanding project but also contribute to a healthier and more comfortable environment. Proper dust management leads to a safer and more enjoyable sanding experience, ensuring your drywall surfaces are smooth and ready for the next steps in your project.
Optional Steps: Wet Sanding and Dustless Sanding with a Drywall Sander
While traditional dry sanding is the most common method for sanding drywall, there are alternative techniques available that can offer specific advantages in certain situations. Let’s explore two optional steps: wet sanding and dustless sanding, and how they can be beneficial during your drywall sanding project.
Wet Sanding
Wet sanding is an alternative technique that involves using water during the sanding process. Instead of dry sandpaper, you use wet sandpaper, which is specifically designed for use with water. Wet sanding creates a slurry of water and fine drywall dust on the surface, which helps to minimize airborne dust particles. This technique is particularly useful when dealing with drywall joint compound, as it reduces the risk of creating dust clouds and ensures a smoother finish.
To perform wet sanding, lightly wet the sandpaper and the drywall surface. Sand the drywall using gentle circular or back-and-forth motions. As you sand, periodically rinse the sandpaper to prevent clogging. Wet sanding is especially effective for achieving a polished finish on drywall patches, seams, and corners.
Dustless Sanding
Dustless sanding is a method that utilizes sanding tools and equipment with built-in dust collection systems. These tools are designed to capture and contain the majority of dust generated during sanding, significantly reducing airborne dust and minimizing cleanup afterward.
One common dustless sanding tool is the vacuum-powered drywall sander. This tool connects to a shop vacuum, which effectively captures the dust as you sand. Some electric sanders also come with dust collection bags that trap the dust for easy disposal.
Dustless sanding is an excellent option for those who prioritize cleanliness and wish to avoid the hassle of extensive cleanup. It is particularly beneficial when working in enclosed spaces or areas with limited ventilation.
While wet sanding and dustless sanding are optional steps, they can be valuable additions to your drywall sanding toolkit. Consider using these techniques based on the specific needs of your project, such as achieving a smoother finish or reducing dust in your workspace. Always follow the manufacturer’s guidelines when using any sanding method or equipment to ensure safety and optimum performance. With these alternative techniques at your disposal, you can take your drywall sanding to the next level and achieve professional results with ease.
Final Thoughts
Sanding drywall may seem like a challenging task, but armed with the right knowledge and techniques, you can achieve professional results. Remember to start by preparing your workspace thoroughly, clearing the area and protecting nearby surfaces. Choosing the right grit sandpaper is crucial; progress from coarser grits for initial sanding to finer grits for the finishing touches.
During the sanding process, prioritize dust control to maintain a clean and safe environment. Use a dust mask and safety goggles to protect yourself, and consider wet sanding or dustless sanding techniques for reduced airborne dust and easier cleanup.
Whether you opt for hand sanding or utilize a pole sander, practice consistency and patience to ensure a smooth and even surface. Don’t forget to inspect your work regularly to identify areas that may need further attention.
By following these steps, you’ll transform your drywall into a polished canvas ready for painting, finishing, or any other desired application. With proper preparation, dust control, and the right techniques, your drywall sanding project will yield professional-grade results, leaving you with a sense of accomplishment and pride in your beautifully finished walls.