How to Use a Miter Saw – The Definitive Guide
A miter saw is a powerful and versatile tool that can greatly enhance your woodworking projects. It is commonly used for making accurate crosscuts, miter cuts, bevel cuts, and compound cuts in various materials such as wood, plastic, and even metal. Whether you’re a seasoned DIY enthusiast or just starting out, learning how to use a miter saw properly is essential for achieving precise and professional-looking results.
Understanding how to use a miter saw safely and effectively is of utmost importance. This tool, with its sharp rotating blade and powerful motor, can be hazardous if not handled with care. By familiarizing yourself with the correct techniques and safety precautions, you can not only protect yourself but also improve your efficiency and accuracy in woodworking tasks. So, let’s dive into the world of miter saws and explore how to make the most of this valuable tool while ensuring your safety.
Understanding the Miter Saw
Before diving into the practical aspects of using a power miter saw, it’s important to familiarize yourself with its key components and the different types available. This knowledge will help you make informed decisions and choose the right miter saw for your specific needs.
Components of a Miter Saw
The miter saw consists of several essential components that work together to facilitate precise cuts. These include:
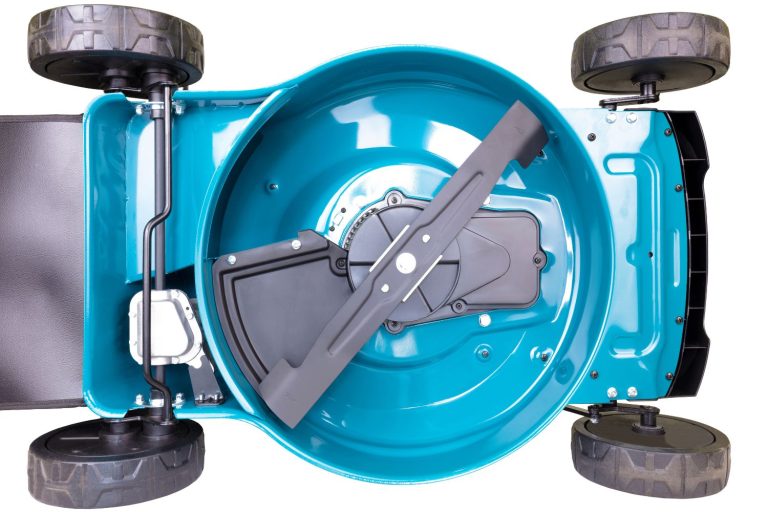
- Blade: The circular blade is responsible for cutting through the material. It’s essential to use the appropriate blade for different materials and cutting tasks.
- Motor: The motor powers the blade’s rotation and determines the cutting speed. It’s important to choose a miter saw with sufficient power for your intended projects.
- Fence: The fence acts as a guide, ensuring that the workpiece remains stable and perpendicular to the blade during the cutting process.
- Bevel Controls: Miter saws often come with bevel controls that allow you to tilt the blade to make bevel cuts at various angles.
Types of Miter Saws
Miter saws come in different types, each offering unique features and capabilities. Understanding these types will help you select the right one for your woodworking tasks. Here are the main types:
- Standard Miter Saw: This type allows you to make accurate crosscuts and miters at predetermined angles.
- Compound Miter Saw: Compound miter saws have the ability to tilt the blade in addition to making miter cuts. This enables you to create bevel cuts along with the angled miter cuts.
- Compound Sliding Miter Saw: Sliding compound miter saws have a sliding mechanism that allows you to move the blade forward and backward. This feature increases the saw’s cutting capacity, making it suitable for larger workpieces.
Different Sizes and Variations Available
Miter saws come in various sizes, and the right choice depends on your specific needs and available workspace. Smaller miter saws are portable and ideal for on-site projects, while larger ones offer increased cutting capacity for larger materials. Additionally, some miter saws come with additional features like laser guides or LED lighting to enhance precision.
By understanding the components, types, and variations of miter saws, you’ll be equipped to make an informed decision when purchasing or using one. So, take your time to explore the options available and consider your woodworking requirements to find the perfect miter saw that suits your needs.

Safety Precautions
When using a miter saw, prioritizing safety is crucial. By following a few important precautions, you can create a secure working environment and reduce the risk of accidents. Let’s take a closer look at the essential safety measures to keep in mind when using a miter saw.
Importance of Wearing Personal Protective Equipment (PPE)
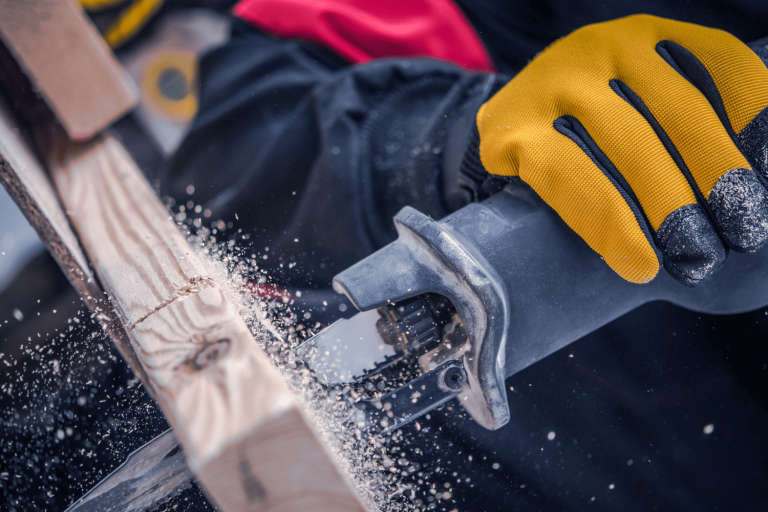
To safeguard yourself against potential hazards, always wear the appropriate personal protective equipment (PPE). This includes safety glasses or goggles to protect your eyes from flying debris, ear protection to minimize noise exposure, and a dust mask to prevent inhalation of sawdust. Additionally, consider wearing gloves to improve grip and protect your hands.
Ensuring a Safe Working Area
Before operating the miter saw, make sure your work area is clean, well-lit, and free of clutter. Remove any obstructions or tripping hazards that may interfere with your movements. Ensure that the surface beneath the miter saw is stable and level, providing a secure base for the tool.
Proper Handling and Storage of the Miter Saw
When handling the miter saw, be cautious and maintain a firm grip on the tool at all times. Keep your fingers away from the blade and the cutting area. When not in use, store the miter saw in a secure and dry location, preferably in a locked cabinet or with the blade guard in place.
Understanding the Manufacturer’s Safety Guidelines and Warnings
Each miter saw model may have specific safety guidelines outlined by the manufacturer. Familiarize yourself with the user manual and any safety warnings provided. Pay particular attention to recommended operating procedures, maximum cutting capacities, and any restrictions or precautions related to the miter saw’s features.
By adhering to these safety precautions, you can significantly reduce the risk of accidents and injuries while using a miter saw. Remember, safety should always be the top priority when working with power tools. So, take the time to prepare your workspace, wear the appropriate protective gear, handle the miter saw with care, and follow the manufacturer’s safety guidelines. With these measures in place, you can work confidently and enjoy the process of using a miter saw while keeping yourself safe.
Setting Up the Miter Saw
Before you begin making precise cuts with your miter saw, it’s important to ensure that it is properly set up. Setting up the miter saw correctly will not only improve your accuracy but also contribute to a safer working environment. Let’s explore the key steps involved in setting up a miter saw.
Positioning the Miter Saw
Start by selecting a suitable location for your miter saw. You can choose between placing it on a sturdy workbench or using a dedicated miter saw stand. Whichever option you go for, stability is crucial. Make sure the surface is level and capable of supporting the weight of the miter saw.
Adjusting the Blade Height and Bevel Angle
Begin by adjusting the height of the blade. The miter saw blade should be set at a height that allows it to cut through the workpiece without any excessive protrusion. Typically, a general rule of thumb is to set the blade height just slightly higher than the thickness of the material you are cutting.
If you intend to make bevel cuts, adjust the bevel angle accordingly. Most miter saws have bevel controls that allow you to tilt the blade to the desired angle. Be sure to consult the manufacturer’s instructions or user manual for specific guidance on adjusting the bevel angle for your particular miter saw model.
Aligning the Miter Saw’s Fence and Table Extensions
Proper alignment of the miter saw’s fence and table extensions is essential for accurate and consistent cuts. Check that the fence is parallel to the blade and firmly locked in place. This will ensure that your workpiece remains stable and perpendicular to the blade during cutting.
Additionally, if your miter saw has table extensions, make sure they are aligned with the main table to create a smooth and even surface for supporting longer workpieces. Adjust and tighten the table extensions as needed to maintain a continuous and level workspace.
By taking the time to set up your miter saw correctly, you are laying the foundation for precise and safe cutting. Positioning the saw securely, adjusting the blade height and bevel angle appropriately, and aligning the fence and table extensions will contribute to smoother operations and improved accuracy. With these steps completed, you’re ready to move on to using the miter saw to make your desired cuts confidently.
Basic Techniques for Using a Miter Saw
Now that your miter saw is properly set up, let’s dive into some basic techniques that will help you make precise cuts for various woodworking projects. These techniques cover a range of cutting methods, allowing you to tackle different angles and workpieces with ease.
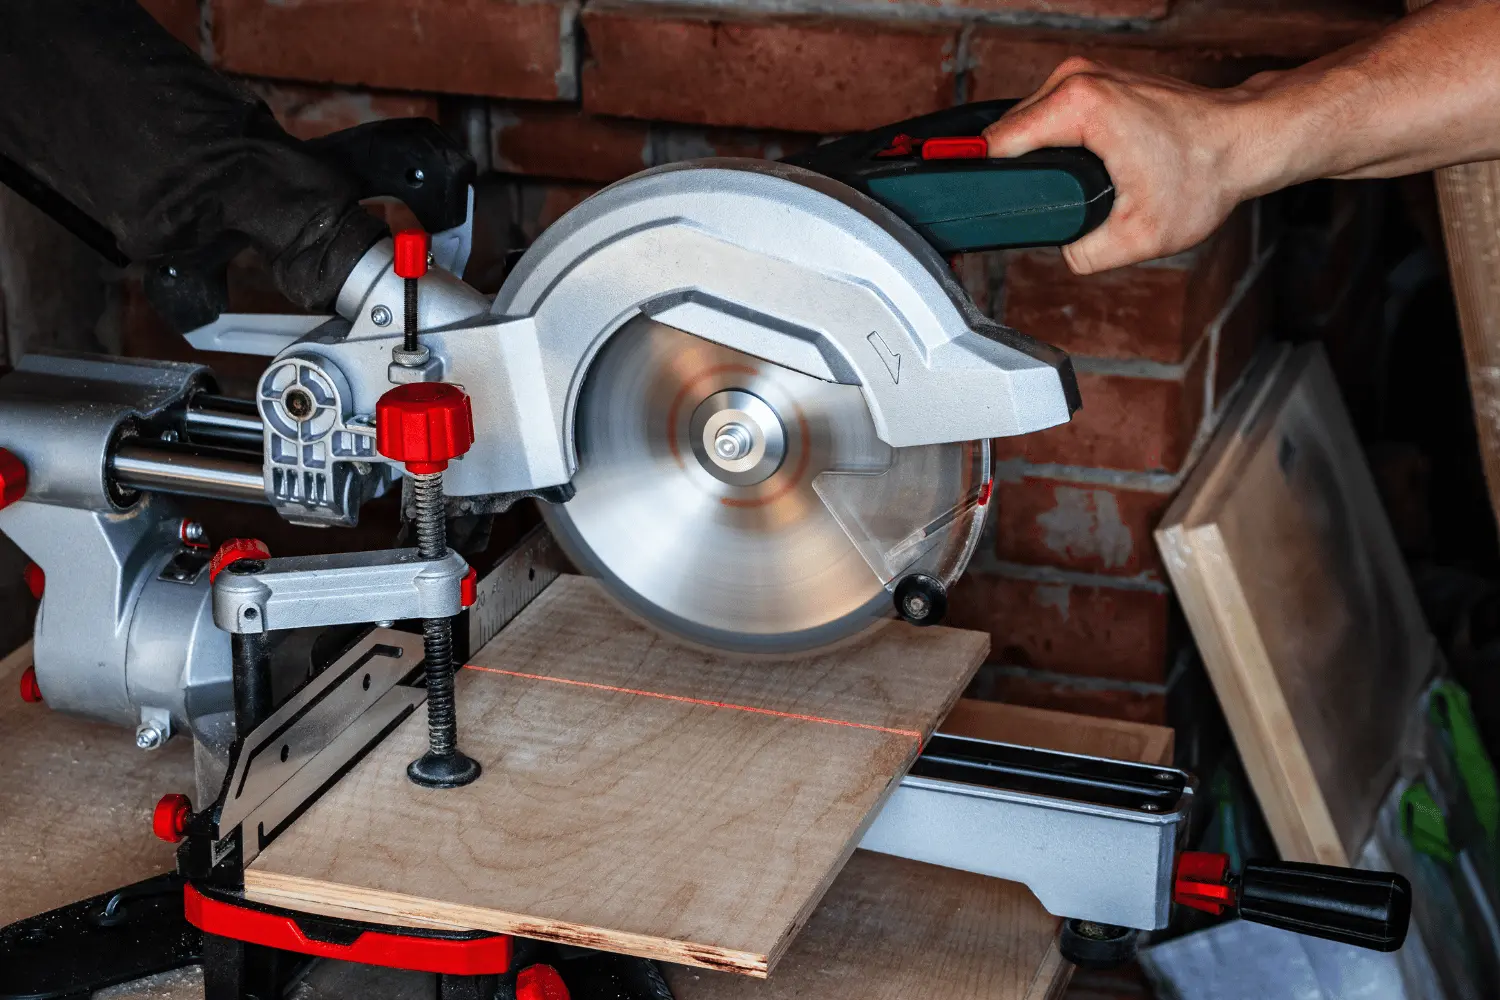
Making Straight Crosscuts
Straight crosscuts are the foundation of many woodworking projects. To make a straight crosscut, position your workpiece against the fence, ensuring it is securely pressed against it. Align the cutting line with the desired position on the blade. Hold the workpiece firmly and activate the miter saw to smoothly cut through the material. Remember to keep your hands clear of the blade and allow it to come to a complete stop before lifting it.
Cutting Miters and Bevels
Miter cuts are angled cuts made across the width of the workpiece. Bevel cuts, on the other hand, involve tilting the blade to make angled cuts along the thickness of the material. To cut miters, adjust the miter saw’s miter gauge to the desired angle, typically indicated on the saw’s scale. Secure the workpiece against the fence and make the cut. For bevel cuts, adjust the bevel angle and follow the same procedure.
Creating Compound Miter Cuts
Compound miter cuts combine both miter and bevel angles, allowing you to create complex shapes and joinery. To make a compound miter cut, adjust both the miter and bevel angles accordingly. Carefully position the workpiece against the fence and make the cut, ensuring proper alignment with the desired cutting line.
Trimming and Cutting Smaller Pieces Using Jigs or Sleds
When working with smaller pieces or making repetitive cuts, jigs or sleds can be incredibly helpful. Jigs are custom-made guides that hold the workpiece securely and provide stability during cutting. Sleds, on the other hand, are larger platforms that slide along the miter saw’s fence, facilitating accurate and safe cuts for small or narrow workpieces. Utilizing jigs or sleds can enhance both your safety and precision while working with smaller materials.
Remember to always maintain a firm grip on the workpiece, maintain a steady pace, and allow the blade to come to a complete stop before removing the cut piece or making adjustments. Practicing these basic techniques will gradually improve your skills and confidence in using a miter saw effectively.
By mastering straight crosscuts, miters, bevels, compound miter cuts, and utilizing jigs or sleds for smaller pieces, you’ll have a solid foundation to take on a wide range of woodworking projects with your miter saw.

Advanced Techniques and Tips
Once you have mastered the basic techniques of using a miter saw, you can explore advanced techniques and incorporate some helpful tips to elevate your woodworking skills even further. These techniques and tips will allow you to tackle more intricate projects and achieve professional-level results.
Making Repetitive Cuts with a Stop Block
When you need to make multiple identical cuts, using a stop block can greatly enhance efficiency and accuracy. A stop block is a piece of wood or other material clamped or secured to the miter saw’s fence. It acts as a physical barrier that allows you to position your workpiece consistently, ensuring uniformity across all the cuts.
Using Auxiliary Fences for Improved Accuracy
Auxiliary fences are additional guides attached to the miter saw’s fence. They provide extra support and can help eliminate tear-out or splintering on delicate or narrow workpieces. By attaching a sacrificial piece of wood or a zero-clearance strip to the auxiliary fence, you create a clean and solid surface for the material to rest against, resulting in cleaner cuts.
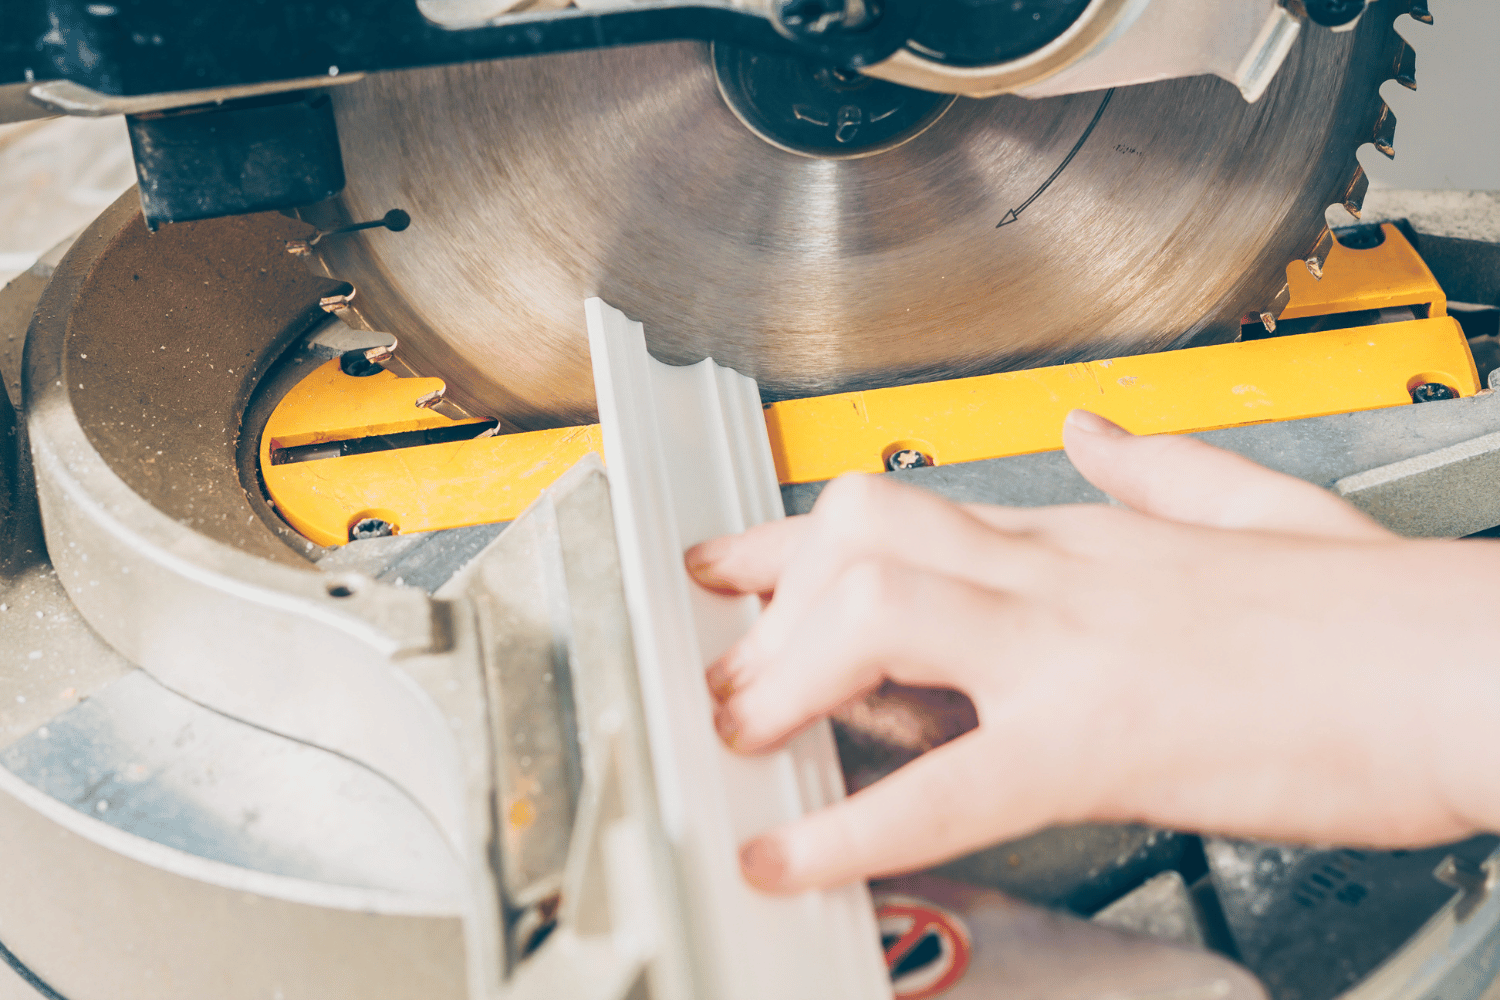
Cutting Crown Molding and Other Complex Profiles
Miter saws are particularly well-suited for cutting crown molding and other intricate profiles. To cut crown molding, you’ll need to position it upside down on the miter saw and make bevel and miter angle adjustments accordingly. It’s essential to use precise measurements and take your time to ensure a seamless fit when joining multiple pieces of molding.
Mitigating Tear-Out and Blade Marks
Tear-out and blade marks can sometimes occur during the cutting process, especially on delicate or brittle materials. To mitigate these issues, you can use masking tape or painter’s tape along the cut line. The tape acts as a protective barrier, reducing the likelihood of tear-out and minimizing visible blade marks. Remember to remove the tape after making the cut.
By incorporating these advanced techniques and following these tips, you can elevate your miter saw skills and achieve even greater precision and quality in your woodworking projects. Whether you’re making repetitive cuts with a stop block, using auxiliary fences for improved accuracy, cutting complex profiles like crown molding, or taking steps to mitigate tear-out and blade marks, these techniques will help you tackle more intricate tasks with confidence.
As with any skill, practice is key. Take the time to experiment, learn from your experiences, and continue to refine your techniques. The miter saw is a versatile tool, and with dedication and practice, you’ll unlock its full potential and achieve impressive results in your woodworking endeavors.
Troubleshooting Common Issues
While using a miter saw can be a rewarding experience, it’s not uncommon to encounter some challenges along the way. Understanding how to troubleshoot common issues will help you overcome obstacles and ensure smooth operation of your miter saw. Let’s explore some common problems and their solutions.
Dealing with Inaccurate Cuts
If you find that your cuts are consistently inaccurate, there are a few potential causes to consider. First, check the alignment of the blade and make sure it is properly secured. Use a square to verify that the blade is perpendicular to the table and fence. Additionally, check the accuracy of the miter gauge and bevel angle settings. If adjustments are needed, consult your user manual for specific guidance on recalibrating your miter saw.
Resolving Blade Wobble or Vibrations
Blade wobble or vibrations can lead to rough or uneven cuts. To address this issue, start by checking if the blade is securely tightened and properly installed. If the blade is damaged or worn out, replace it with a new one. Ensure that the arbor nut is tightened correctly to eliminate any play or movement. If the problem persists, consider having the saw inspected by a professional to diagnose and resolve any mechanical issues.
Addressing Motor or Power-Related Problems
If you encounter motor or power-related problems, such as the motor not starting or the saw not receiving power, begin by checking the power source. Ensure that the power cord is securely connected, and check if the outlet is functioning properly. If the motor does not start, verify that the safety features, such as the trigger lock, are disengaged. If the issue persists, consult the manufacturer’s troubleshooting guide or contact their customer support for further assistance.
Remember, troubleshooting may require a combination of simple adjustments and professional expertise. If you are unsure or uncomfortable with addressing certain issues, it is always best to seek assistance from a qualified technician or contact the manufacturer’s customer support.
By being proactive in addressing common issues with your miter saw, you can maintain its performance and prolong its lifespan. Regular maintenance, such as cleaning the saw, lubricating moving parts, and inspecting for wear and tear, can also help prevent problems from arising.
By familiarizing yourself with troubleshooting techniques and reaching out for assistance when needed, you can overcome common challenges and continue enjoying the benefits of using your miter saw in your woodworking projects.
Final Thoughts
Congratulations on learning how to use a miter saw effectively! By following the key points and techniques outlined in this article, you have gained the knowledge and skills necessary to make precise cuts and tackle a wide range of woodworking projects that go beyond the capabilities of your circular saw.
As you continue your woodworking journey, remember that practice is key. The more you use your miter saw, the more confident and skilled you will become. Don’t hesitate to explore new projects, experiment with different techniques, and challenge yourself to expand your abilities.
With the knowledge, safety awareness, and techniques you’ve acquired, you’re well-equipped to embark on various woodworking projects and unleash your creativity with the miter saw. Enjoy the process, stay safe, and happy woodworking!
Absolute Precision – Find the Best 12-Inch Miter Saw