The Lathe Machine – Everything You Need To Know
You’re keen to master the lathe, aren’t you? That’s fantastic! You’re about to dive into an incredible world of creativity and precision. But before you start turning raw materials into masterpieces, you’ll need to get familiar with the tools of the trade.
This ultimate guide to lathe tools will not only introduce you to the essential equipment but also help you choose the right ones. You’ll learn everything from sharpening and maintenance to mastering lathe techniques.
We’ll troubleshoot common issues and even share tips for a safe and efficient lathe experience. So, let’s get started, shall we?
With this guide, you’re set to take control and elevate your lathe work to new heights.
Key Takeaways
- There are various types of lathes, including engine lathes, toolroom lathes, turret lathes, wood lathes, and metal lathes.
- Lathe components include the bed, headstock, tailstock, carriage, and tool post.
- Wood lathes are used for woodturning and crafting bowls, vases, and furniture legs.
- Metal lathes are used for shaping metal and offer precision and complexity in projects.

Understanding the Lathe
Ready to delve into the fascinating world of lathes? Let’s explore the various types of lathes that you can use, each designed for specific tasks. Understanding these aspects is crucial for practical application, ensuring you can operate a lathe efficiently and safely.
First, let’s discuss the different types of lathes. There are several variations, including engine lathes, toolroom lathes, and turret lathes. Each type has its own set of features and capabilities, allowing you to choose the most suitable one for your specific needs.
Next, let’s take a closer look at the essential components that make up a lathe. These include the bed, headstock, tailstock, carriage, and tool post. Each component plays a vital role in the lathe’s functionality and contributes to its overall performance.
Understanding the lathe’s components and their functions is crucial for operating the machine efficiently. It ensures that you can make precise cuts and achieve the desired results while maintaining safety standards.
By gaining a thorough understanding of the different types of lathes and the components that make up these machines, you’ll be well-equipped to operate a lathe effectively and safely. So let’s dive in and explore the fascinating world of lathes!
Types of Lathes
You’re about to delve into the fascinating world of lathes, where you’ll discover the unique attributes of Wood Lathes, Metal Lathes, and Mini Lathes.
Wood Lathes offer you a wide range of possibilities, from crafting intricate wooden designs to shaping robust metal parts, or even working on small, detailed projects with a Mini Lathe.
You’ll learn how each type operates, their specific applications, and the practical skills required to maximize their use.
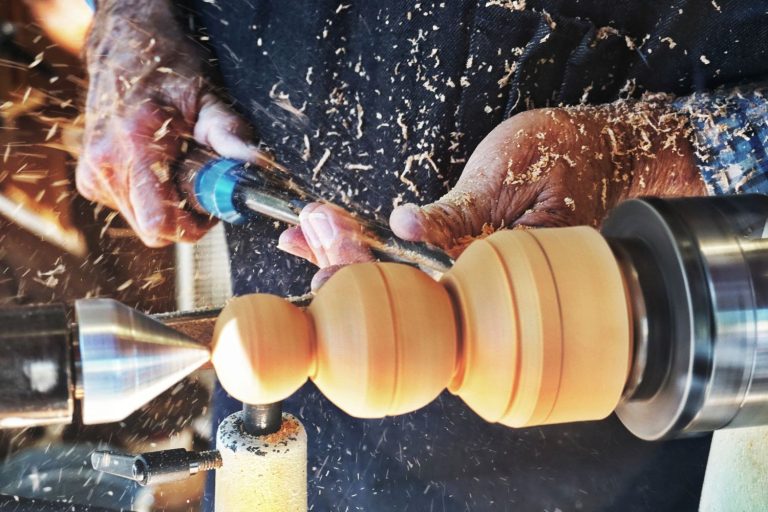
Wood Lathe
Diving into the world of wood lathes is fascinating, isn’t it? These tools have the incredible ability to transform a simple piece of lumber into a work of art.
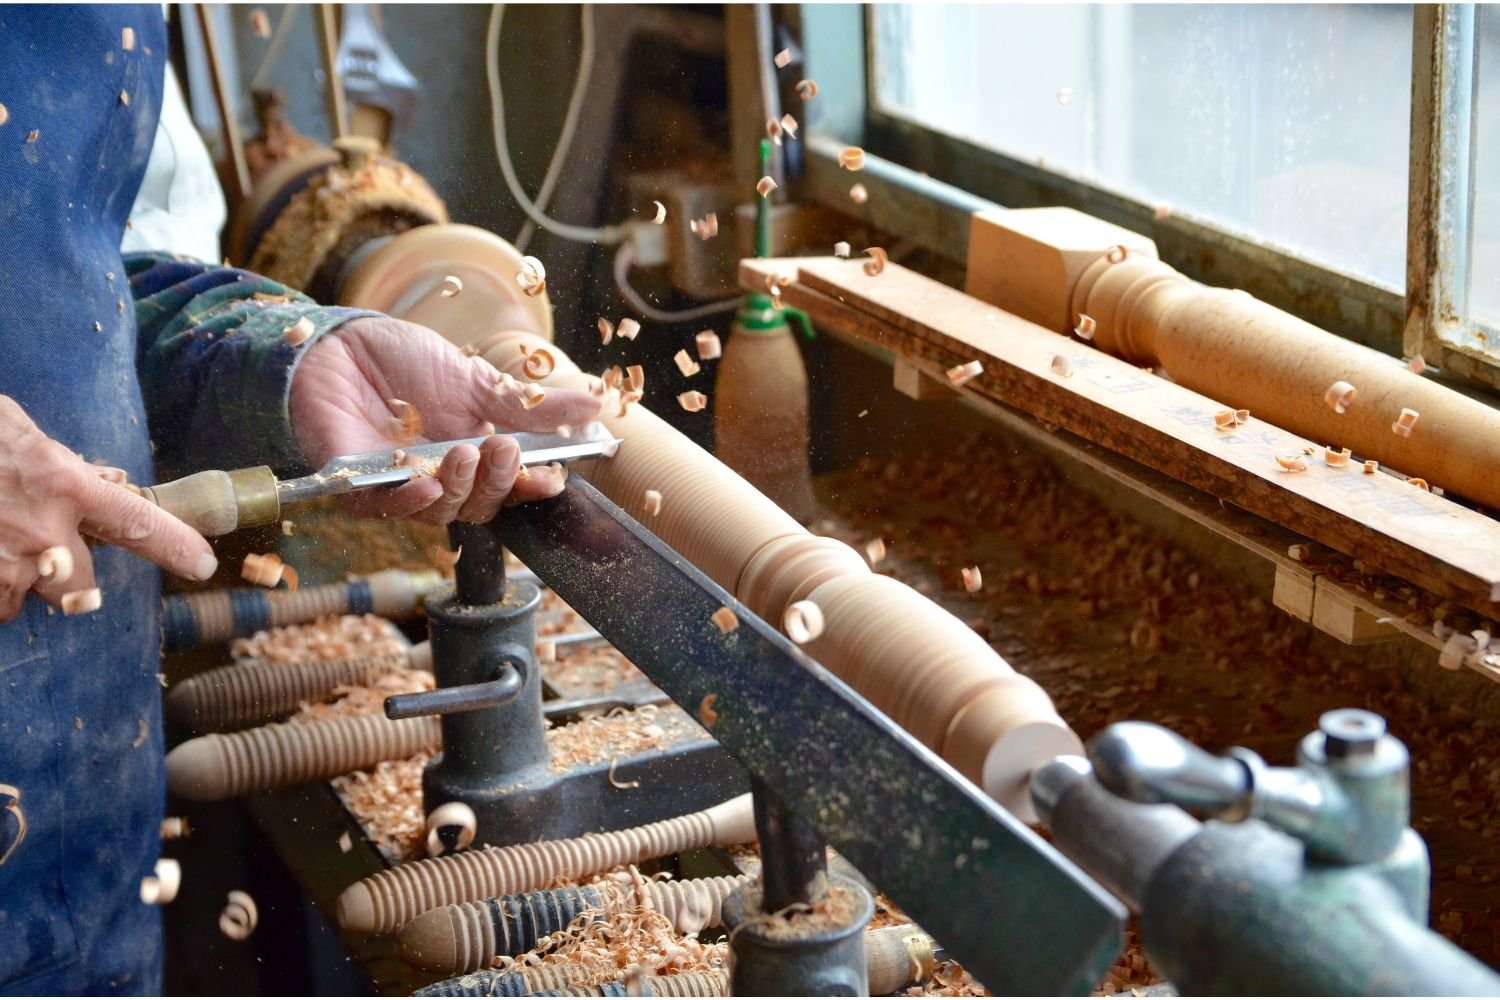
- Woodturning: At the core of woodworking lathes is the art of woodturning. This process allows craftsmen to create intricate designs and shapes by rotating the wood while cutting and shaping it with various tools.
- Using a lathe: Using a lathe requires precision and control. It often tests your woodworking skills as you learn to manipulate the wood and tools to achieve the desired shape and design. It’s a skill that takes practice and patience to master.
- Wood Lathe: The wood lathe itself is your best ally in crafting beautiful, hand-made wooden pieces. It provides the platform and power needed to rotate the wood and facilitate the woodturning process. With the right lathe, you can create stunning bowls, vases, furniture legs, and many other wooden objects.
Master these concepts, and you’ll be a pro in no time.
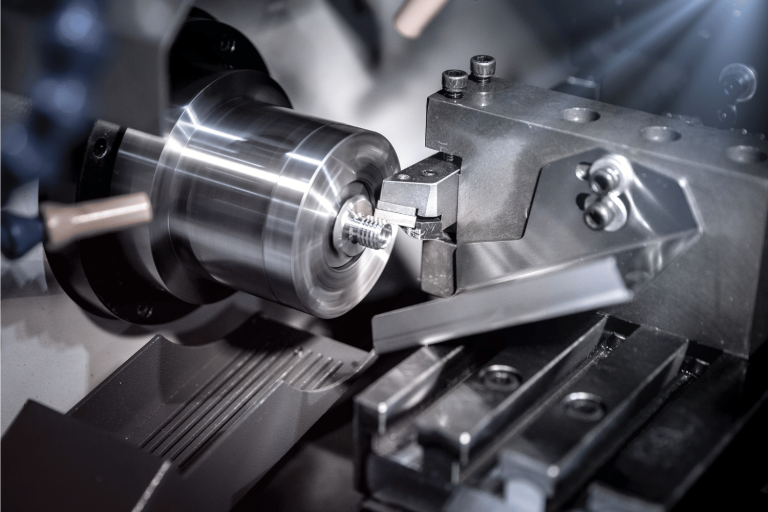
Metal Lathe
Switching gears to metalworking, it’s remarkable how a metal lathe can shape raw metal into precision parts and intricate designs. This machine tool employs a cutting tool, which carefully carves your workpiece held by the chuck.
The spindle, another crucial component, rotates at varying speeds, giving you control over your project.
Learning to master your metalworking lathe is a rewarding endeavor, taking your craft to new levels of precision and complexity.
Mini Lathe
If you’re looking to take on intricate projects with a smaller footprint, a mini lathe might be just what you’re after. This lathe machine is ideal for those who desire control over their work.
A mini lathe allows you to mount your workpiece and use lathe tools for precision work.
Various types of tooling you can use:
- Cutting tools
- Boring tools
- Drilling tools
Main Components of a Lathe
Let’s delve deeper into the primary components of a lathe that make it an indispensable tool for shaping, cutting, and finishing materials.
You’ll find the bed as the backbone of the lathe, providing a solid base for the headstock, tailstock, and tool rest.
The headstock houses the spindle which spins the workpiece.
The tailstock supports the other end of the workpiece.
The tool rest holds the cutting tools at a convenient position for precise operations.
Bed
You’re going to appreciate the bed of a lathe tool. It’s the backbone of the entire operation, providing the stability and precision you need for your projects.
As a machinist, the lathe bed is crucial to your control over the type of lathe you’re operating. Its ridged structure allows for precise movements, ensuring the operator executes each task with the utmost accuracy.
Headstock
Now that we’ve covered the bed, let’s move on to the headstock. This is where the real magic of lathe work happens.
The headstock of your engine lathe is a powerhouse, responsible for controlling your spindle speeds. Here’s what you need to know:
- Your chuck or collet goes here for holding work.
- Chuck: great for larger, irregular pieces.
- Collet: perfect for smaller, more precise work.
Tailstock
In the heart of your workshop, there’s nothing quite like the tailstock of your engine. It is a vital component that brings balance and stability to your every project. It firmly holds workpieces, providing perfect alignment.
The lathe is an ancient tool, yet in its modern form, the tailstock is essential. It supports the workpiece, allowing the tool post to craft it with precision and control.
Tool Rest
Mastering the use of the tool rest is crucial, as it’s not just a simple placeholder – it’s your key to precision and safety.
This workbench component holds your lathe tools steady, ensuring accurate cuts.
Always properly fasten the tool rest to the workbench, positioning tool holders securely.
Properly maintained and correctly positioned, the tool rest becomes an invaluable ally in your quest for control and precision in your projects.
Spindle
Turning your attention to the spindle, you’ll find it’s the heart of your woodturning experience, acting as the core for all your workpieces. This is where the CNC lathes come into play, offering precision control over the diameter of your workpiece, the ability to lathe will turn and remove material accurately, and a steady, reliable spindle for consistent results.
Mastering the spindle is your key to quality craftsmanship.
Chuck
You’ll find the chuck to be an equally critical component in your woodturning endeavors. It provides secure holding for your workpiece while it spins.
This device is included in your lathe setup and is essential for tasks where the work is usually held in place. The chuck is often used in conjunction with a faceplate for added stability.
Understanding these tools ensures a smooth, controlled turning process.
Essential Lathe Tools and Accessories
You’re ready to dive into the world of lathe tools and accessories – a must-have set for any serious craftsman.
Let’s start with the turning tools for woodworking, which will transform blocks of wood into elegant pieces.
Then, we’ll delve into cutting tools, crucial for precision metalworking.
Of course, we can’t forget about safety equipment – it’s not just about creating masterpieces, it’s about doing it safely.
Turning Tools for Woodworking
You’re about to delve into the world of woodworking lathe tools, an arena where detail and precision are paramount.
There’s more to this craft than meets the eye, with tools such as gouges, scrapers, parting tools, and skew chisels playing critical roles in achieving the perfect finish.
Each tool has its unique application. Gouges shape the wood, scrapers refine it, parting tools provide details, and skew chisels smooth out the surfaces. All these tools contribute to the artistry of woodworking.
Gouges
Let’s dive into the world of gouges, an essential type of lathe tool that’ll transform your woodworking projects into masterpieces.
Gouges are indispensable for toolmaking, offering quick-change capabilities for seamless operations.
Harness the power of CNC capabilities with precision gouges to achieve superior control.
Remember, mastering lathe tools, especially gouges, takes time, but the results are worth every effort.
So, gear up and take your woodworking to the next level.
Scrapers
Shifting gears now, let’s delve into the domain of scrapers. These vital woodworking instruments can refine your creations with unparalleled finesse. Scrapers were first used on turret lathes and are designed for precision. Nowadays, modern scrapers are often employed in computer numerical control (CNC) machining. With their sharp edges, they allow you to remove unwanted material, offering control and accuracy in your woodworking projects.
Parting Tools
Now, let’s discuss parting tools, which are an essential component in the woodworker’s arsenal. These tools are employed for creating precise grooves and sections in your woodworking endeavors.
- Parting tools: These tools are key for mechanical lathes, as they enable woodworkers to make precise cuts.
- Lathe tools: As mentioned in this ultimate guide, parting tools are vital for control when working with a lathe.
- Mechanical lathes: These types of lathes work best when paired with specific parting tools.
- External threads: Parting tools can create external threads with precision, allowing woodworkers to add intricate details to their projects.
Mastering these tools will help you dominate your woodworking projects.
Skew Chisels
Feel the thrill of mastering your craft as you learn to wield skew chisels. This tool can transform a simple piece of wood into a work of art. As a cornerstone of any modern machine shop, its versatility is unmatched. With high-speed precision, you can shape even automotive parts on your milling machine.
Harness the power of skew chisels and take control of your craft.
Cutting Tools for Metalworking
In your journey as a metalworker, you’ll encounter several key cutting tools vital for your craft. Let’s delve into the specifics of Carbide Inserts, known for their durability and precision, and High-Speed Steel (HSS) Tools, which are renowned for their versatility.
We’ll also touch on the use of Boring Bars for creating precise holes and Threading Tools for crafting intricate screw threads.
Carbide Inserts
Carbide inserts are known for their impressive hardness and heat resistance. They can significantly ramp up your lathe work efficiency while maintaining a superb finish. These inserts allow the tool to become one of the most productive machines in your arsenal.
Their easy-to-create design makes them common uses in various fields. With carbide inserts, your lathe will perform at its peak, ensuring control and precision in every task.
HSS (High-Speed Steel) Tools
Despite their old-school reputation, don’t underestimate the power and versatility of HSS (High-Speed Steel) tools. Born in the industrial revolution, these tools still shine on multiaxis bench lathes and drill presses.
They can handle thousands of rotations per minute, offering precision and control that newer tools often can’t match.
So, don’t discount the old guard; they’re often the perfect solution for your turning needs.
Boring Bars
Don’t overlook the significant role of boring bars in the machine shop world, as they can dramatically enhance the precision and finish of your projects.
Boring bars are cylindrical shafts that allow you to duplicate precise holes. They are a moveable tool, offering control and adaptability. Their design ensures accuracy, making them indispensable for technical projects.
Mastering their use will significantly boost your craftsmanship.
Threading Tools
Now that we’ve covered boring bars, let’s tread into the world of threading tools.
Threading tools are essential for creating precise threads along the axes of your workpiece. You’ll typically use your lathe’s carriage and saddle to guide the tool along the cross slide, ensuring optimal control.
Mastering threading tools gives you the power to craft intricate, high-quality threads with ease and precision.
Safety Equipment
When working with metal, your safety is paramount. Always remember to wear eye protection to guard against flying debris. Also, remember to wear dust masks to prevent inhalation of harmful particles. Additionally, utilize lathe guards to shield against potential mishaps. These indispensable pieces of safety equipment not only protect you but also ensure a smooth operation. Therefore, they are a necessary part of the metalworking process.
Eye Protection
It’s imperative to understand that the use of lathe tools necessitates proper eye protection to shield your vision from potential harm caused by flying debris or sparks. This ultimate guide to lathe tools emphasizes the importance of wearing safety goggles. Especially when handling high torque operations, adjusting the pulley, or cutting sheet metal.
Never compromise your eye safety during any lathe operations.
Dust Masks
Don’t forget, your lungs need protection too. Make sure you’re strapping on a dust mask before you start chipping away. This article section of our ultimate guide to lathe tools emphasizes your safety.
Dust masks filter airborne particles, keeping your lungs free from harmful dust. Choosing the right mask is crucial, and this article will guide you in making an informed decision.
Stay in control, safeguard your health.
Lathe Guards
Safety should always be your top priority, and that’s where machine guards come in handy! In the ultimate guide to lathe tools, we mention that lathe guards are a necessity.
Their attachment usually requires a careful, secure process, often involving epoxy. These guards protect you from flying debris, keeping your workspace safe.
Remember, control of your lathe also means control of your safety measures.
Choosing the Right Lathe Tools
Understanding the geometry of your lathe tools is a critical factor in selecting the right ones for your specific projects. It’s not just about picking the sharpest tool, but understanding how the shape and design of the tool can influence the finish and precision of your work.
So, let’s delve into the world of tool geometry and learn how to select the perfect tools for your unique projects, ensuring you’re always equipped with the right tool for the job.
Understanding Tool Geometry
Understanding tool geometry is crucial for optimizing the performance of your lathe tools. The cutting edge angles, the shape and size of the tool, and the material it is made of all significantly impact its performance. By comprehending these factors, you can effectively select and utilize your lathe tools with precision and efficiency.
Tool geometry plays a critical role in the performance of your lathe tools.
The cutting edge angles, the tool’s shape and size, as well as the material it’s made of, all have a profound impact on how well your tool performs.
By gaining a concrete grasp of these elements, you’ll be able to select and use your lathe tools with precision and efficiency.
Cutting Edge Angles
Mastering the art of adjusting cutting edge angles on your lathe tools can significantly improve your crafting precision and overall project results. This ultimate guide will help you understand the right taper to apply for the perfect cut.
Remember, a steep angle cuts aggressively, while a shallow angle gives a smoother finish. You can also sand the edges for refined results.
Control is key when working with lathe tools.
Tool Shape and Size
Having grasped the importance of cutting edge angles, let’s now delve into the tool shape and size.
These factors, as ancient Egypt’s artisans knew, directly impact your control over the lathe’s work, whether shaping table legs or even larger pieces.
The tool’s shape affects its ability to navigate the material’s perimeter, while size influences the depth and width of your cuts.
Choose wisely for optimal control.
Tool Material
Next, let’s delve into the importance of the material your tools are made from, as this can greatly impact the effectiveness and longevity of your work.
High-speed steel (HSS) is durable and flexible, perfect for most projects.
Carbide-tipped tools, on the other hand, are harder and wear-resistant, ideal for heavy-duty tasks.
Choose wisely, as the right tool material can significantly enhance your control over the workpiece.
Selecting Tools for Specific Projects
When you’re tackling a project, selecting the right tool is crucial.
For instance, faceplate turning requires a different set of tools than spindle turning, bowl turning, or thread cutting.
We’re here to guide you through the process, ensuring you have the necessary knowledge to make the right tool choice, optimizing your work for efficiency, precision, and quality.
Faceplate Turning
Faceplate turning is an essential skill to master in your journey with lathe tools. It gives you the ability to create beautiful and intricate designs. To excel at faceplate turning, there are a few key steps to follow:
- Select the proper faceplate: Size matters when it comes to balance and stability. Choose a faceplate that is appropriate for the size and weight of your workpiece.
- Secure your workpiece: It is crucial to ensure that your workpiece is level and firmly attached to the faceplate. This will prevent any wobbling or shifting during the turning process.
- Apply appropriate turning techniques: When faceplate turning, it is important to be patient and carve slowly. Take your time and maintain a steady hand to achieve precise and smooth cuts.
By following these steps and practicing regularly, you will be able to improve your faceplate turning skills and create stunning designs on your lathe.
Spindle Turning
Mastering spindle turning can open up a whole new world of creativity and precision in your woodworking endeavors.
Spindle turning involves shaping wood into cylindrical pieces.
You’ll need the right tools, like a roughing gouge to start, a spindle gouge for detailed work, and a parting tool for cutting off.
It’s about control and finesse, so practice patience and persistence for perfect spindles.
Bowl Turning
Diving into the art of bowl turning is a thrilling adventure that’s sure to add a new dimension to your woodworking skills. This process requires specific tools:
- Bowl Gouge: Essential for roughing out and shaping.
- Sweep: Determines the cut’s aggressiveness.
- Flute: Influences the cut’s shape.
- Scraper: For refining the bowl’s inner surface.
- Parting Tool: To separate the bowl from the lathe.
Master these, and your control over bowl turning will be unmatched.
Thread Cutting
Thread cutting is like threading a needle through the eye of precision. Each turn of the screw creates intricate patterns. To perform thread cutting, you’ll need a threading tool, a dial indicator, and a steady hand. Adjust your lathe’s speed and align your tool at the right angle. Gradually cut into your workpiece, measuring repeatedly to ensure accuracy. This process demands control, but the resulting threads are worth the effort.
Lathe Tool Sharpening and Maintenance
Understanding the importance and how to sharpen lathe tools is vital to the success of your projects, whether they involve woodturning or metalworking. You’ll want to master various sharpening techniques specific to your tools. A sharp tool not only ensures precision but also enhances safety during use.
Alongside sharpening, proper tool maintenance and storage are key aspects that will prolong the life of your tools and keep them in optimal working condition.
Importance of Sharp Tools
The importance of sharp tools cannot be overstated. Sharp lathe tools can significantly enhance your woodworking experience by providing precision, efficiency, and a better overall finish. A dull tool not only hampers your work but also increases the risk of accidents.
Maintaining a keen edge on your tools is essential. It allows you to create smoother cuts, reduce the amount of sanding needed, and minimize tear-out.
In addition, sharp tools require less force to use, giving you greater control and reducing fatigue. They also produce cleaner cuts, which means you won’t have to spend as much time and effort on finishing your project.
Investing time and effort in maintaining the sharpness of your lathe tools pays off in the long run. It enhances not only your productivity but also your safety.
Sharpening Techniques for Woodturning Tools
Mastering the art of sharpening your woodturning instruments can dramatically improve your woodworking experience, leading to more precise cuts and a smoother finish. Let’s delve into the practical applications to ensure you’re equipped with the knowledge to do this correctly.
- Choose the right grinder: Select a standard bench grinder with an 8-inch wheel for optimal performance. The slower speed reduces heat build-up, which can affect the temper of your tools.
- Pick the correct grit: Usually, an 80-grit wheel is ideal for shaping tools and a 120-grit wheel is perfect for regular sharpening.
- Use a jig: This will help maintain a consistent angle while sharpening. With practice, you’ll achieve a keen edge for your lathe tools.
By applying these techniques, you’ll gain better control, leading to a more efficient and satisfying woodturning experience.
Sharpening Techniques for Metalworking Tools
Just as you’ve mastered the art of sharpening woodturning tools, it’s time to dive into the world of metalworking tools. Sharpening these tools is a different ball game, demanding precision and meticulous care. Let’s delve into the techniques that allow you to gain a flawless edge on your lathe cutters.
For starters, ensure your grinding wheel is clean and undamaged. It’s crucial to maintain a steady, gentle pressure while grinding – too much force can damage the tool. Always keep the tool moving across the wheel, focusing on keeping the edge straight.
Cooling the tool regularly prevents overheating, which can warp the metal. Practice makes perfect, so don’t be disheartened if your first few attempts aren’t up to scratch. With time, you’ll gain the control needed to achieve a razor-sharp edge.
Proper Tool Maintenance and Storage
After honing your metalworking tools to perfection, there’s no denying the importance of proper maintenance and storage to ensure their longevity.
- Clean Your Tools: After each use, make sure to wipe your lathe tools clean of any residue or debris. This prevents buildup that could corrode or damage the tool.
- Store Properly: Tools should be stored in a dry, cool place, ideally in a toolbox or cabinet. This protects them from exposure to moisture and temperature fluctuations, which can cause rust and other deterioration.
- Regular Maintenance: Regularly inspect your tools for any signs of wear or damage. If spotted early, you can often repair or address the issue before it becomes a major problem.
Remember, proper tool care is essential for maintaining their efficiency and prolonging their life.
Mastering Lathe Techniques
Ready to take your lathe skills to the next level? Let’s delve into mastering lathe techniques.
First, let’s start with facing and centering stock. This is a fundamental process that ensures your workpieces are properly prepared.
Next, we’ll move on to mounting workpieces securely and safely. It’s important to have a solid grip on your workpiece to prevent accidents and achieve accurate results.
Now, let’s explore basic and advanced turning techniques. These techniques will allow you to shape your projects with precision and efficiency.
By mastering these lathe techniques, you’ll be able to elevate your woodworking skills and create beautiful, professional-grade pieces. So, let’s get started!
Facing and Centering Stock
Before you can create your masterpiece, you’ll need to master the fine art of facing and centering your stock on the lathe. This is crucial to ensure precision and balance during the turning process.
To face your stock, secure it in the chuck, align your tool perpendicular to the stock, and slowly advance the tool into the workpiece. This will create a smooth, flat end surface.
Centering is equally important. You’ll need to use a center finder to pinpoint the exact middle of your stock, then use a center drill to create an indent. This will serve as a guide for your lathe’s live center, ensuring your workpiece is perfectly aligned.
Remember, control over these techniques is key to achieving a flawless result.
Mounting Workpieces
Mounting your workpiece correctly is a critical step that should not be taken lightly. It is like the opening act of a great gig, setting the tone for the performance to follow. To ensure safety and accuracy, follow these steps:
- Start with a clean, dry surface. Any dirt or moisture can skew your measurements or cause slippage.
- Use a mounting plate or chuck to secure your workpiece. A three jaw chuck is ideal for cylindrical objects, while a four jaw chuck is great for irregular shapes.
- Adjust the jaws until the workpiece is firmly gripped but not damaged.
Always double-check your settings before starting your lathe. A poorly mounted workpiece can lead to inaccuracies in your work or even cause accidents.
Take control and mount wisely.
Basic Turning Techniques
You’re about to delve into the world of lathe tools, where each technique holds its own significance.
Firstly, roughing – it’s the initial step, where you remove large amounts of material to shape your workpiece.
Next, sizing, where precision comes into play as you’re determining the exact dimensions.
Finally, smoothing, the finishing touch, where you’re refining the surface to eliminate any imperfections and achieve a polished look.
Roughing
Diving right into the world of lathe tools, it’s essential to understand that roughing is a critical initial process. It shapes your workpiece with precision and sets the stage for finer detailing.
To begin, choose a robust roughing gouge. This tool will swiftly remove material, establishing the basic shape and size of your workpiece. Make sure the tool is sharp, as this will optimize your results. Use controlled, steady motions while roughing to ensure accuracy and avoid any mishaps.
Mastering roughing is key to gaining control over your lathe projects. It’s the foundation upon which you’ll build your finished piece. So take the time to practice and perfect this crucial step before moving on to more intricate details.
Sizing
Once you’ve mastered roughing, it’s time to turn your attention to sizing – the process that takes your project from a simple shape to a perfectly measured masterpiece.
To master sizing:
- Use precision measuring tools like calipers or micrometers.
- Set your lathe’s tool rest at the right height to ensure accuracy.
- Make light, controlled cuts to reach your desired dimensions.
Remember, sizing demands patience and precision.
Smoothing
After getting the size right, it’s time to smooth out those rough edges. Envision the transformation of your project from a blocky, jagged form to a sleek, perfectly polished piece.
Use your skew chisel for this task. It’s crucial to maintain control. Keep the tool’s edge at a slight angle and move it slowly across the surface. This will give you a smooth finish, ready for sanding and polishing.
Advanced Turning Techniques
As you delve deeper into the art of lathe turning, you’ll encounter advanced techniques that can elevate your craftsmanship.
These techniques include: – Hollowing: a method of removing material from the inside of a workpiece. – Off-center turning: an intriguing process that can create unique, non-symmetrical objects. – Decorative techniques: a variety of methods that can add intricate details to your designs.
Each of these complex procedures requires not only an understanding of the mechanics but also a keen eye for detail and a steady hand.
Hollowing
Peering into the raw, untouched interior of your wood piece, you’ll find that hollowing is an essential step in creating intricate bowls or vases on a lathe.
It’s a technical skill requiring control and precision. Choose the right hollowing tool for your workpiece size and shape.
Make steady, controlled cuts, always mindful of the desired wall thickness.
With practice, you’ll master this technique, enabling you to create beautifully hollowed pieces.
Off-Center Turning
Now that you’ve mastered hollowing, let’s turn our attention to off-center turning. This technique will give your projects a unique twist. Here’s your guide:
- Secure the wood off-center in your lathe.
- Take slow, controlled cuts for safety.
- Use a robust tool for initial shaping.
- Refine with a finer tool.
Remember, precision is key in off-center turning. Practice and patience will give you the control you desire.
Decorative Techniques
Delving into the realm of decorative techniques, you’ll find that these artistic enhancements can truly make your woodworking projects stand out.
Master the art of fluting, spiraling, and knurling for an exquisite finish.
Use a skew chisel for precise cuts, or try a texturing tool for unique patterns.
Remember, it’s all about control. Practice consistently, adjust your lathe’s speed accordingly and watch your craftsmanship elevate.
Troubleshooting Common Lathe Issues
Facing issues with your lathe like vibration and chatter, tear-out and snags, or tool dig-ins? You’re not alone. These are common problems, along with out-of-round turning, that can frustrate even the most seasoned lathe users. But don’t worry – we’re here to help you understand and troubleshoot these challenges to ensure your lathe work goes smoothly.
Vibration and Chatter
Understanding the impact of vibration and chatter is crucial when working with lathe tools, as they can significantly affect the finish and precision of your work. These issues usually occur due to improper tool setup, unbalanced workpiece, over-ambitious cutting speeds, or a combination of these.
To keep control and mitigate these problems, consider the following:
- Tool Setup: Ensure your tool is secured tightly. Loose tools are a common cause of vibration.
- Workpiece Balance: Always check your workpiece is balanced before starting. An unbalanced workpiece can cause unnecessary chatter.
- Cutting Speeds: Don’t get too ambitious with your cutting speeds. Always start slow and gradually increase the speed.
- Tool Sharpness: Keep your tools sharp. Dull tools can cause increased resistance and vibration.
Mastering these aspects will greatly improve your work’s quality and precision.
Tear-out and Snags
Navigating the frustrating world of tear-outs and snags can feel like a real chore, but don’t let it dampen your spirit. Understand that these issues are often caused by blunt tools, incorrect feed rates, or improper tool angles.
To avoid tear-outs, ensure your lathe tools are sharp and the tool rest is at an appropriate height. A too high or too low tool rest can lead to unwanted gouges in your workpiece. Adjust your feed rate to a slower speed, giving your tool more time to cut the material cleanly.
For snags, inspect your workpiece for any knots or irregularities before starting. These can catch your tool and cause a snag. By taking control of these factors, you can minimize the occurrence of tear-outs and snags.
Tool Dig-ins
Dealing with tool dig-ins can certainly throw a wrench in your woodworking plans, but don’t fret – with a few adjustments, you can get back on track smoothly. The key lies in understanding the causes and solutions for these pesky problems.
- Identify the Cause: Tool dig-ins often occur when you apply excessive force or misalign the tool. So, pay attention to your technique.
- Adjust the Tool Rest: Ensure the tool rest is at the right height and angle. It should support the tool without hindering its movement.
- Sharpen your Tools: Dull tools can cause dig-ins. Regular sharpening keeps tools in tip-top shape.
- Practice Control: Master the art of control. It’s not about strength but about accuracy and finesse.
By following these steps, you can take control and prevent tool dig-ins.
Out-of-round Turning
Moving on from the challenges of tool dig-ins, let’s tackle another common issue – out-of-round turning.
When you’re working on your lathe, it’s crucial to produce perfectly round objects; anything less is unacceptable. Out-of-round turning can occur due to several factors including incorrect tool positioning, uneven pressure, or a misaligned headstock.
It’s not just about aesthetics but also about precision and function. To prevent this, ensure your tools are always sharp and well-positioned. Apply steady, even pressure when turning and regularly check your equipment for any misalignments.
Remember, mastering the lathe requires patience and practice. Stay in control, refine your technique, and keep perfecting your skill. With time, you’ll conquer out-of-round turning and produce work that’s as precise as it is beautiful.
Tips for a Safe and Efficient Lathe Experience
As you venture into your next lathe project, there’s more to consider than just the task at hand. Think about your lathe setup and workspace organization – is everything in its place and easily accessible?
Are you mindful of your body positioning and movement to ensure efficiency and prevent strain?
Never underestimate the importance of safety best practices; always wear appropriate protective gear and keep your work area clear of hazards.
And remember, proper dust collection and ventilation aren’t just about keeping your space clean, they’re critical for your health and safety.
Let’s delve into these tips for a safe, organized, and efficient lathe experience.
Lathe Setup and Workspace Organization
Before you even switch on your lathe, it’s crucial to arrange your workspace and set up the machine properly. This will create an environment that’s both efficient and safe for your woodworking.
Start by positioning the lathe at a comfortable height, typically around waist level. This will reduce strain on your back and provide ample leverage.
Clear the area around the lathe of any debris or clutter that could interfere with your operations.
Next, organize your lathe tools within arm’s reach. Categorize them by type for easy identification and access.
It’s also wise to have a dedicated place for accessories like faceplates, chucks, and centers.
Finally, keep safety equipment, like safety glasses and dust masks, close by.
A well-organized lathe workspace ensures a smoother, safer, and more enjoyable woodworking experience.
Proper Body Positioning and Movement
Proper body positioning and movement are crucial for both safety and efficiency when operating a lathe. Here are some key points to keep in mind:
- Posture: Always maintain an upright and relaxed posture. Slouching or leaning too far into the machine can cause fatigue and compromise accuracy.
- Footwear: It’s important to wear sturdy, closed-toe shoes while operating the lathe. This ensures stability and protects your feet from potential falling objects.
- Movements: When performing any lathe operations, it’s essential to execute them in a controlled and deliberate manner. Avoid quick, jerky movements, as they can lead to mistakes or even injuries.
Remember, good positioning and smooth movements not only protect your health but also enhance the precision of your work. By mastering these aspects, you’ll be another step closer to becoming an expert lathe operator.
Safety Best Practices
You’re ready to dive into the nitty-gritty of safety best practices, making sure every move you make is geared towards protecting yourself and maintaining a hazard-free work environment.
First, always wear safety glasses and protective clothing. Loose clothing or dangling jewelry can easily get caught in the machine.
Next, ensure the workpiece is securely fastened in the lathe before starting. Never attempt to adjust the machine while it’s running. Keep your fingers away from the spinning chuck and cutting tools.
Always use the correct tool for the job and ensure it’s sharp. Dull tools can cause accidents.
Finally, keep your work area clean. Accumulated chips and dust can cause slips and falls.
With these safety practices, you’re in control of your workspace and your safety.
Dust Collection and Ventilation
Now that you’ve mastered the safety best practices, let’s pivot to an aspect that often gets overlooked but is equally crucial: dust collection and ventilation.
1. Proper dust collection: Install a dust collection system that is appropriately sized for your workspace. This will help to minimize the amount of airborne dust particles, which can pose a health hazard if inhaled.
2. Ventilation: Ensure your workspace is well-ventilated. Open windows, use fans, or install a ventilation system to circulate fresh air.
3. Personal Protective Equipment (PPE): Even with these systems, always wear a dust mask or respirator while operating the lathe.
Remember, keeping your workspace clean and well-ventilated not only safeguards your health but also enhances your tool’s lifespan and efficiency.

Inspiring Lathe Projects
Now that you’re familiar with safety and efficiency when working with a lathe, let’s delve into some inspiring projects you can undertake.
You can create beautiful wooden bowls, a task that demands precision and patience.
Or try your hand at metal spindle turning for a more industrial feel.
Don’t forget about crafting delicate pens and pencils or even elegant candle holders.
Each project honing your skills and expanding your creative possibilities.
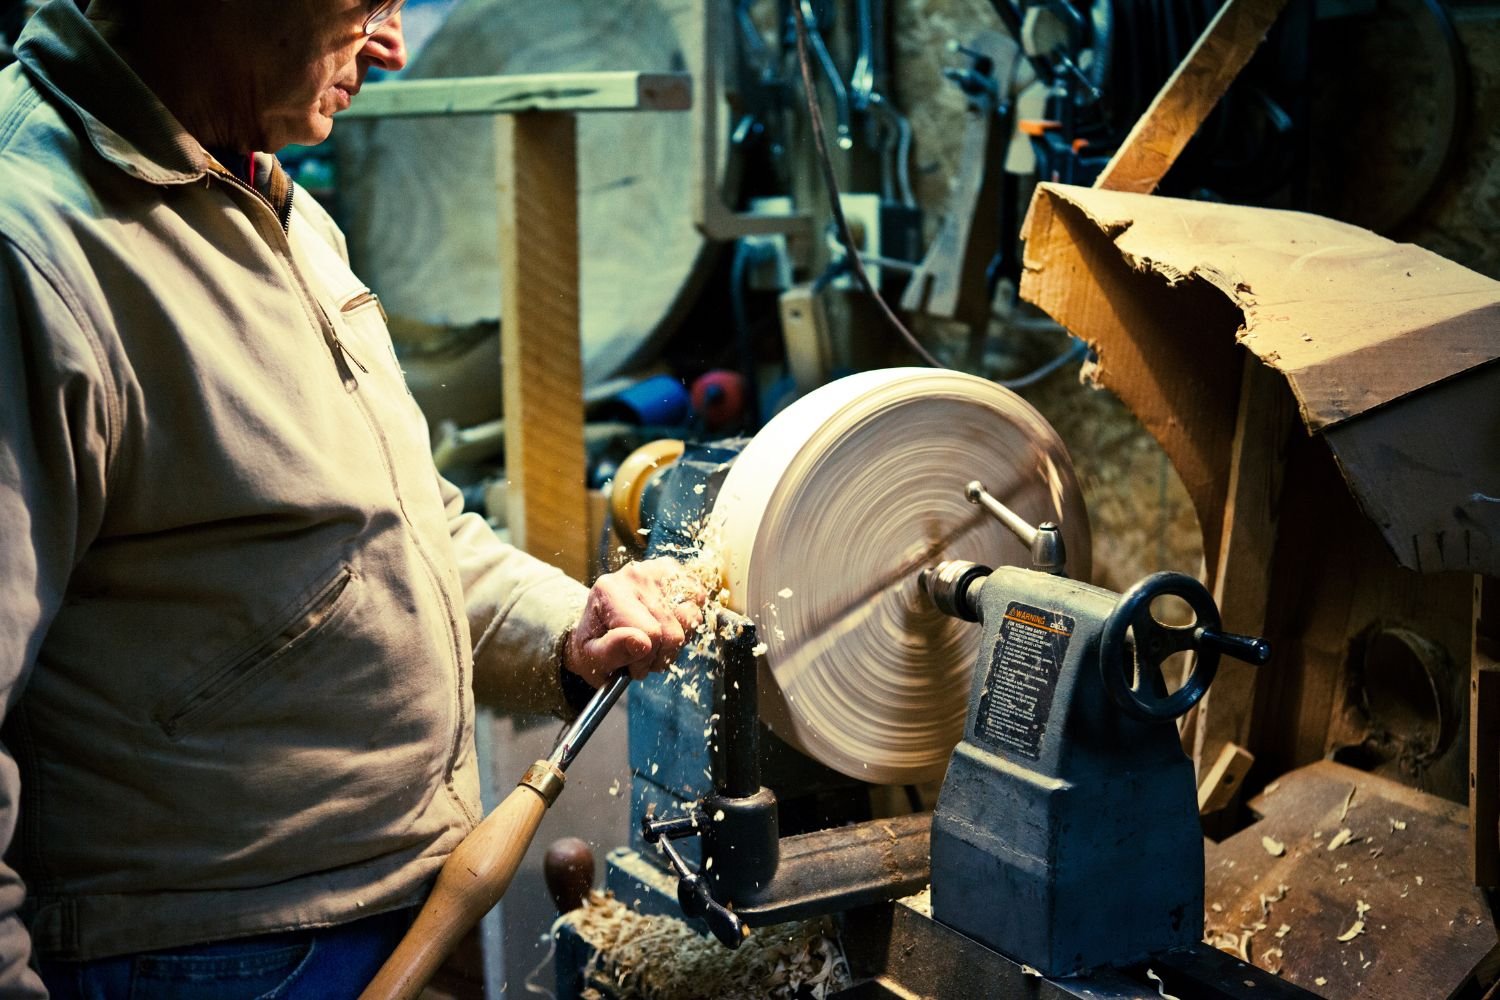
Wooden Bowl Turning
In the intricate art of wooden bowl turning, it’s your crafted hands and keen eye that’ll transform a simple piece of wood into a masterpiece. You’ll need a lathe, sharp gouges, and scrapers to carve your creativity into existence.
Begin by mounting a balanced blank onto your lathe’s faceplate. Your desired bowl shape should be marked on the blank’s surface. Start turning from the outside in, using a bowl gouge to shape the exterior. Once satisfied, hollow the inside with gentle, controlled motions to avoid tearing the grain.
Remember, mastering this requires practice and patience. Keep your tools sharp and your lathe speed moderate, and always wear safety gear.
Soon, you’ll be turning a piece of timber into an elegant, handcrafted wooden bowl with ease.
Metal Spindle Turning
Venturing into the realm of metal spindle turning, you’ll find your hands dancing over the cool, sleek surface of a metal rod, shaping it into a sophisticated piece of artistry that’s as functional as it is beautiful.
The thrill of the process is in the control, the precision, the ultimate mastery of metal.
- You’ll feel the hum of the lathe beneath your fingers, a powerful instrument at your command.
- You’ll taste the sweet satisfaction of shaping a stubborn material into your vision.
- You’ll hear the rhythmic swish and clink of the metal chips falling away.
- You’ll see a raw metal rod transform into an elegant spindle under your steady hands.
Understanding the tools and techniques of metal spindle turning gives you the control and mastery that’s truly empowering.
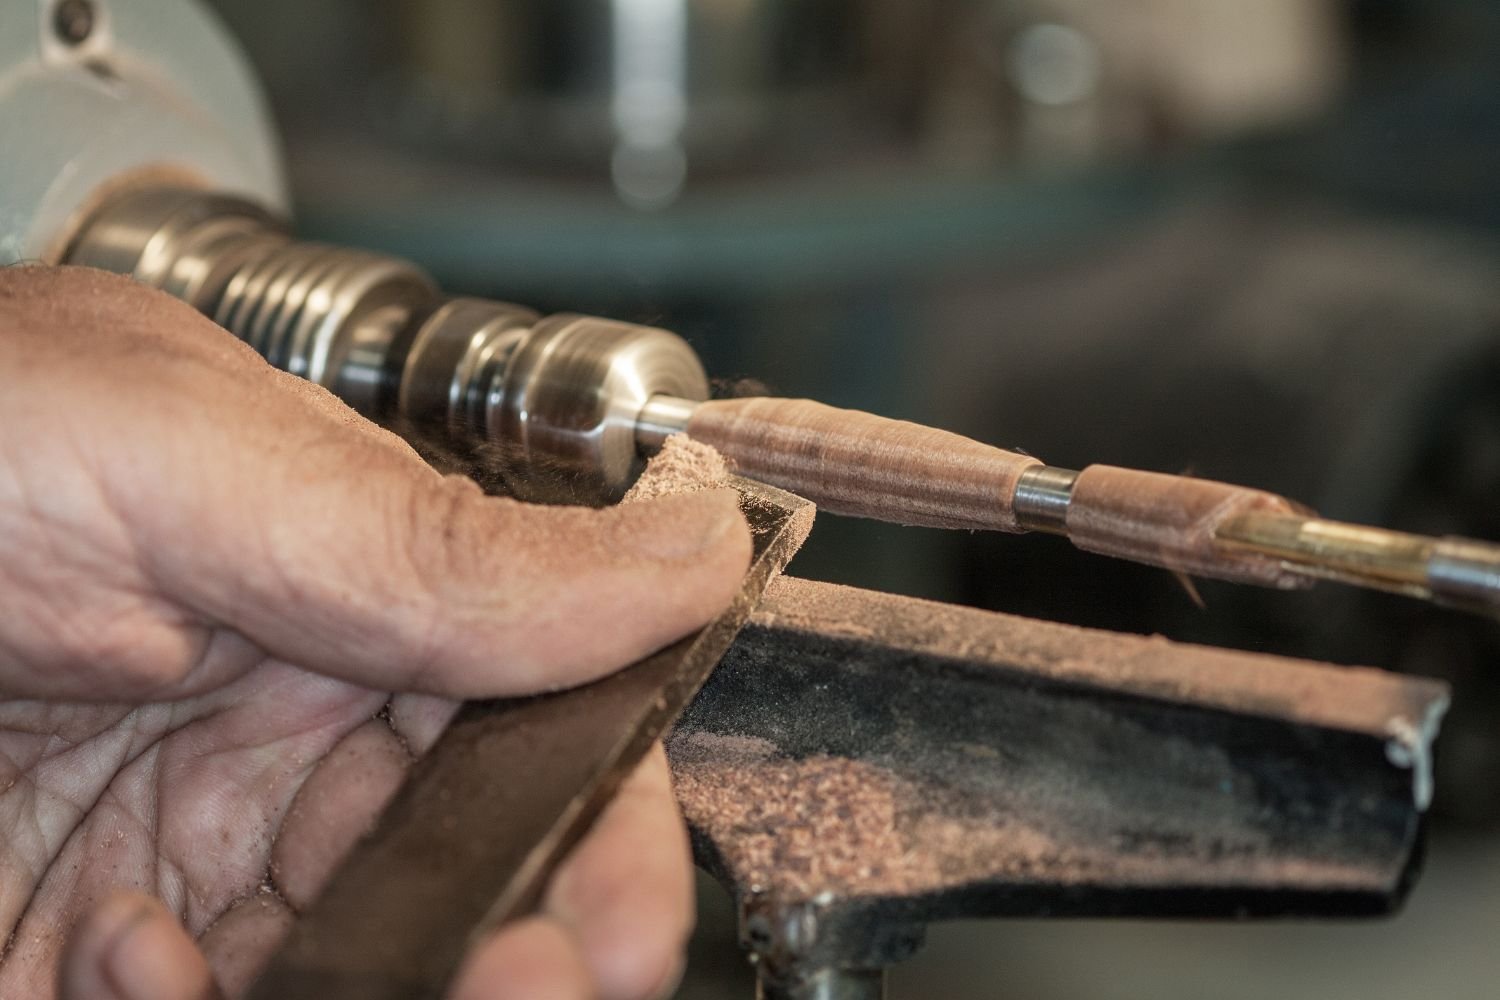
Pens and Pencils
Crafting pens and pencils involves a delicate artistry that showcases your skill and precision. The process relies heavily on the lathe, a vital tool that transforms raw materials into exquisite writing instruments. To begin, you must choose a suitable pen blank, typically made of wood or acrylic. Using a pen mandrel, securely hold the blank so that it spins consistently as you shape it with cutting tools.
When it comes to removing large amounts of material, chisels and gouges are the best tools to use. For finer control, skews and parting tools are ideal. It’s important to remember that patience is crucial in this process. You are not simply making a pen; you are creating a masterpiece. With each pass of the tool, you are one step closer to crafting a functional and beautiful work of art.
Candle Holders
Switching gears now, let’s dive into the world of crafting beautiful candle holders. This task requires a keen eye and a steady hand. You’ll need a roughing gouge, a spindle gouge, and a parting tool for this project.
Begin by mounting your work piece into the lathe. Make sure it’s secure before you start. Use the roughing gouge to carve out a general shape, keeping it simple and symmetrical.
Once you’re satisfied with the bulk of the form, switch to the spindle gouge. Keep control, use it to refine your shape and carve out the candle hole.
Lastly, use the parting tool to separate your piece from the remaining stock. Remember, precision is key. Take your time, you’re in control.
With practice, you’ll be creating stunning candle holders in no time.