Understanding the Wood Router Tool: A Comprehensive Guide
You may be intimidated by the wood router tool, thinking that it’s only for experienced woodworkers. But don’t worry, with this comprehensive guide, you’ll soon understand everything there is to know about this powerful tool.
Whether you’re a beginner or an experienced woodworker, understanding the wood router tool will give you more control over your projects. With this tool, you can create intricate designs and shapes that would be impossible with other woodworking tools. Plus, a router allows you to work on different types of materials such as hardwoods and softwoods with precision and accuracy.
So let’s dive in and learn all about the different aspects of the wood router!
Key Takeaways
- Wood router tools are versatile and can create intricate designs and shapes on different types of materials.
- When selecting a wood router tool, it’s important to consider project requirements, power and speed options, workpiece size, and router bit compatibility. For further consideration, check out our reviews of the best cordless routers.
- Proper handling and operation techniques, as well as regular maintenance and cleaning routines, are crucial for optimal performance and safety.
- Router accessories and attachments, such as jigs, fixtures, and specialized bits, can enhance the functionality and precision of a wood router tool.
Understanding Router Tools
So, you want to know more about router tools?
Well, a router tool is a power tool used for cutting and shaping wood. There are different types of router tools available in the market, such as plunge routers and fixed-base routers.
These tools consist of various components and parts, including the motor, base plate, collet, and bit. Additionally, common features and functionalities of router tools include speed control settings and depth adjustment mechanisms.
What is a router tool?
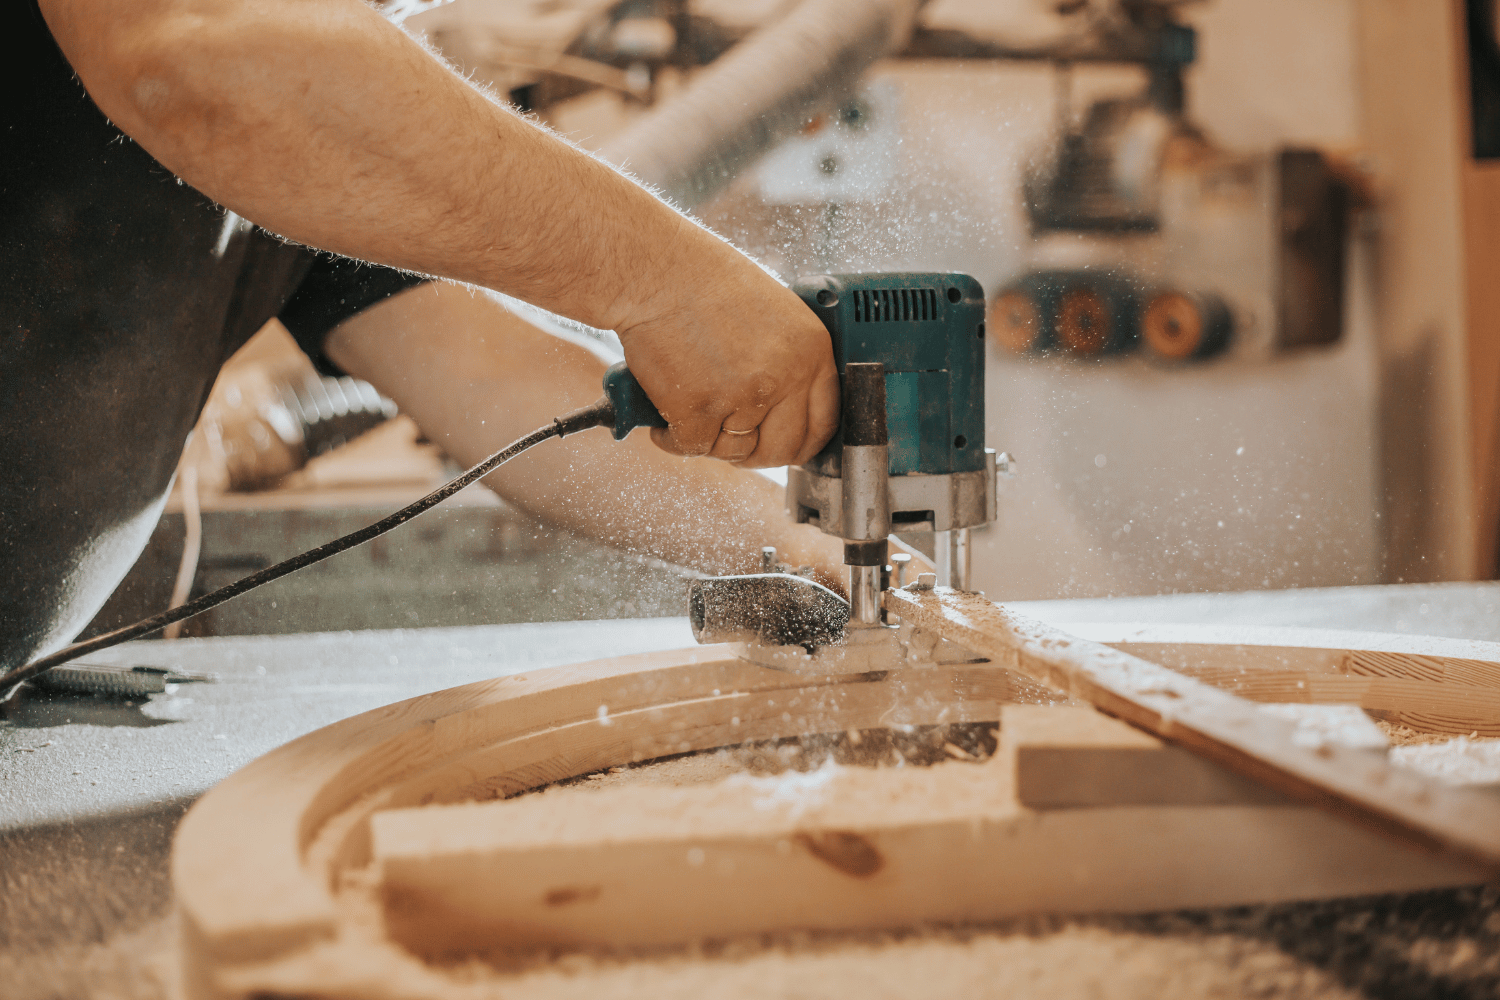
You may be wondering, what exactly is a router tool and how can it benefit your woodworking projects? A router is a versatile power tool used for cutting and shaping wood. It features a motor that rotates a bit at high speeds, allowing you to route out or trim edges in the wood.
A router tool is an essential part of any woodworking project as it helps create intricate designs and smooth finishes. There are different types of routers available, each with their unique features such as fixed-base routers, plunge routers, and trim routers.
Understanding which type of router to use for specific tasks will help you achieve precise results in your woodworking projects. Let’s dive deeper into the different types of router tools available.
Different types of router tools
Now, let’s explore the varying types of routers available for your woodworking needs. The wood router tool is a versatile piece of equipment that can handle many routing tasks such as joinery, edge profiling, and more.
There are two main types of routers: fixed-base and plunge base. Fixed-base routers have a stationary base that keeps the router bit at a constant depth while in use. These are best used for tasks that require consistent depth, such as dadoing or cutting grooves.
Plunge base routers allow you to adjust the depth of the router bit while it’s in use by lowering or raising the motor assembly on two posts. These are great for tasks like carving mortises or making intricate designs. With over 20 different kinds of router bits available for specific tasks such as beading, chamfering, and more, routing can become an art form with endless possibilities.
As you can see, there is no shortage of options when it comes to choosing the right type of wood router tool for your project needs. But before we delve deeper into each type’s components and parts in our next section, let’s take a moment to appreciate these powerful machines’ capabilities!
Components and parts of a router tool
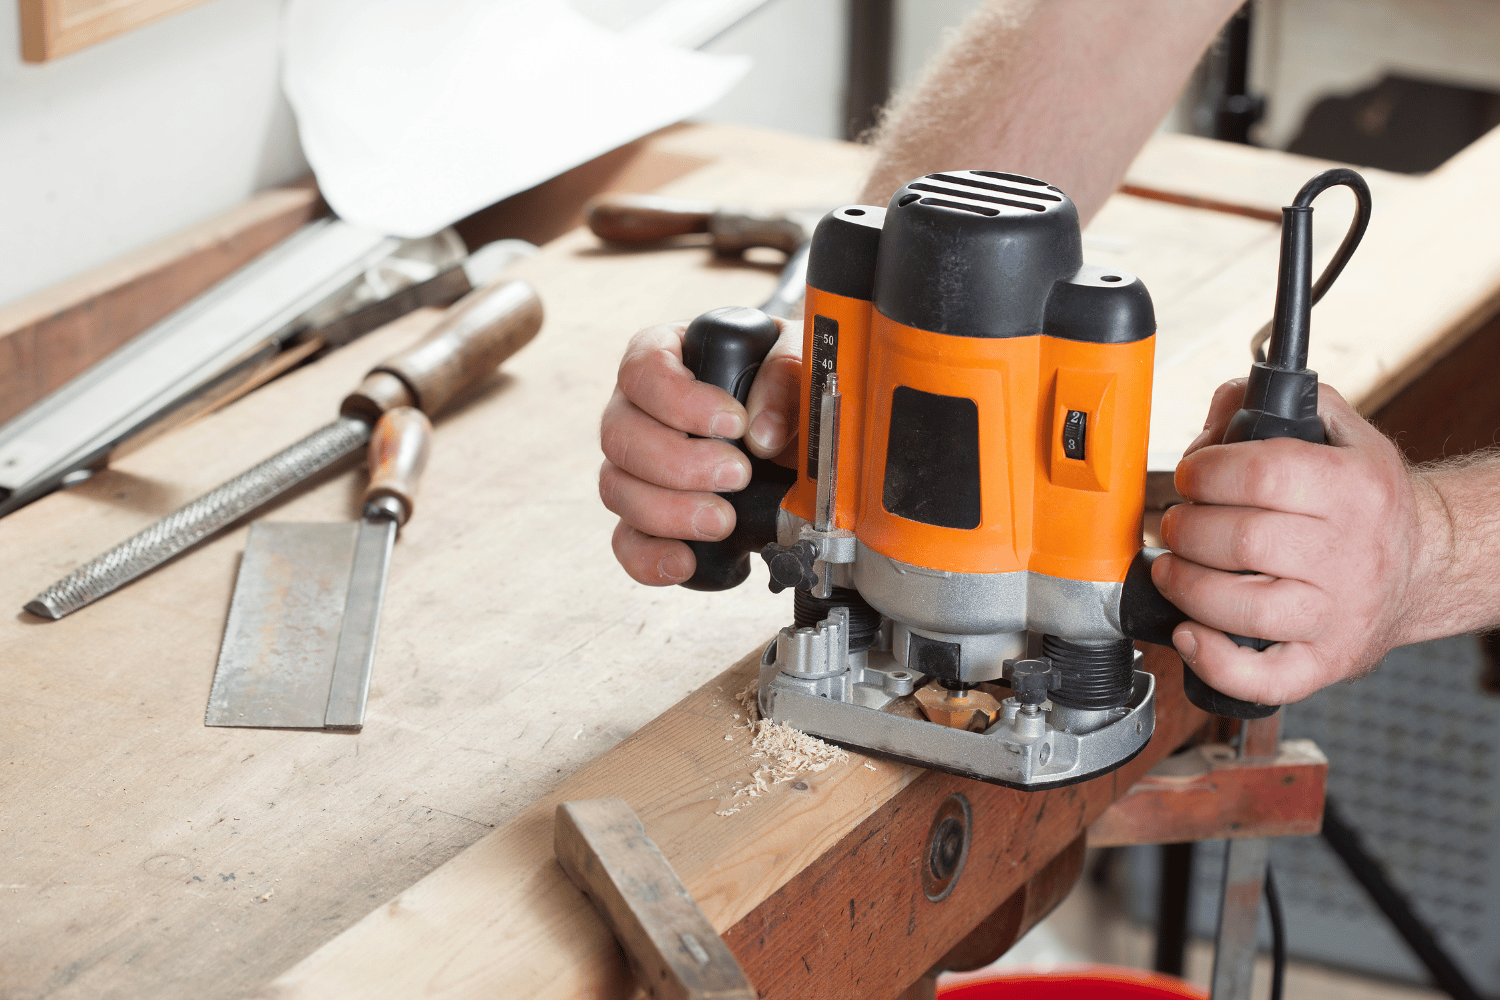
Get ready to discover the inner workings of this powerful machine as we dive into the various components and parts that make up a router tool. When it comes to understanding routers, it’s important to know the key parts that are necessary for proper operation. Here are some essential components you need to be familiar with:
- Router Motor: This is the heart of the router tool and is responsible for powering all its functions.
- Collet: A collet is used to hold different router bits in place and allows for quick and easy bit changes.
- Base: The base of a router tool provides stability and support during use.
- Depth Adjustment: A depth adjustment allows you to set how deep your cuts will be.
In addition, a router tool may come equipped with other features like bearings, switches, or even an entire kit full of accessories. Understanding these components will help you choose the right type of router for your specific needs.
Now that you have an idea about what makes up a basic router, let’s take a look at some common features and functionalities of these tools.
Common features and functionalities of router tools
Let’s explore the impressive features and capabilities that router tools offer for woodworking enthusiasts. Router tools are versatile and can be used in many different ways to work on various projects. Depending on what you need, you can adjust the size of your router bit, making it easier to cut through wood or other materials. This adjustability feature also allows for precision cuts, giving you more control over your project.
One thing that sets router tools apart from other saws is their ability to work with a table. This makes them an ideal tool for larger projects where you need more stability and control over your cuts. The router base is designed to sit on top of a table, which provides a flat surface for routing workpieces. With this setup, you can easily create grooves, rabbets, or even dovetails with ease!
Now that you know about the commonly used features and functionalities of router tools, let’s move onto choosing the right one for your needs.
Choosing the Right Router Tool
When choosing the right router tool for your project, it’s important to assess your needs and project requirements.
Consider the power and speed options of different routers, as well as their bit compatibility and versatility.
Additionally, don’t forget to evaluate ergonomics and ease of use factors, while keeping price range and budget considerations in mind.
By taking these key points into account, you can ensure that you select a router tool that is both effective and efficient for your specific woodworking needs.
Assessing your needs and project requirements
Assessing your needs and project requirements is crucial for selecting the right wood router tool to ensure efficient and effective results. To make sure you get the most out of your tool, consider these three factors:
- Use: Think about how often you’ll use the router and for what purposes. If you’re a handyman who occasionally works on small projects, a compact handheld router may be sufficient. However, if you’re a professional woodworker who frequently works on large pieces of furniture, a table-mounted router with a larger motor may be necessary.
- Workpiece size: The size of your workpiece can also affect which router tool you need. If you primarily work with smaller pieces of wood, then a compact handheld router may be more convenient. But if your projects involve larger or thicker materials, such as doors or countertops, then a plunge-base or fixed-base router mounted onto a table may be better suited for the job.
- Project type: Consider what types of projects you’ll be working on and their specific requirements. For example, if precision is critical for your project (such as creating intricate designs), then look for routers that have built-in guides or templates to help ensure accurate cuts.
By taking all these factors into account when assessing your needs and project requirements, you’ll end up with a wood router tool that’s perfectly tailored to meet your specific needs and deliver great results every time.
With this knowledge in mind, let’s move on to considering power and speed options when choosing the right router tool for your next woodworking project!
Considering router power and speed options
Ready to take your woodworking projects to the next level? Then it’s time to consider the power and speed options available when choosing the right wood router tool for you!
Router power is an important consideration because different species of wood require varying amounts of force to cut through. If you plan on working with harder woods, then a router with higher horsepower will be necessary. On the other hand, if you’ll mostly be using softwoods or laminates, a lower horsepower router might suffice.
Another factor to consider is the depth of the router. Some routers have a fixed base while others offer adjustable depths which can come in handy when working with different thicknesses of wood.
Speed options are also important as they affect how clean and sharp your cuts will be. High-speed settings are best for making precise cuts through hardwoods while slower speeds work better on softer materials like pine or MDF.
With all these various router power and speed options available, it’s essential that you choose wisely based on your particular needs and project requirements before moving on to evaluating router bit compatibility and versatility.
Evaluating router bit compatibility and versatility
Now that you’ve considered the power and speed options of your wood router tool, it’s time to evaluate its router bit compatibility and versatility.
Knowing which bits are compatible with your router will help you choose the right one for your project. Router bit compatibility is determined by the shank size, or the part of the bit that fits into the collet of the router. Make sure to check if your router can accommodate both 1/4 inch and 1/2 inch shank sizes as this will expand your options when choosing bits.
Router bit versatility should also be taken into consideration when choosing a wood router tool. Some routers come with interchangeable bases that allow for different types of routing such as edge routing or plunge routing. Additionally, having a variety of bits to choose from allows for more creative freedom in shaping and cutting workpieces.
Whether you’re a handyman or DIY enthusiast, understanding how to use different types of bits can elevate your woodworking projects to another level by creating intricate designs or strong joints using joinery bits.
With an understanding of router bit compatibility and versatility, let’s now move on to discussing ergonomics and ease-of-use factors when selecting a wood router tool.
Ergonomics and ease of use factors
Once you’ve got your hands on a wood router, it’s important to make sure that it fits comfortably in your hand like a glove so that you can hit the ground running and create woodworking masterpieces. The ergonomics of the tool should be evaluated before making a purchase.
You need to consider its size, weight, and balance for comfortable use during extended periods of time. To use the router effectively, you also need to evaluate ease-of-use factors such as the placement of controls and switch buttons. Additionally, check if the router base is easy to adjust and maneuver around tight corners or edges.
When cutting dadoes or grooves, make sure that the distance between the center of the bit and edge guide is easy to measure accurately with clear markings on both tools. If not set up correctly, it can burn wood or leave rough edges instead of producing flush cuts.
Transitioning into price range and budget considerations, evaluating these factors will help determine which type of wood router best suits your needs without breaking the bank.
Price range and budget considerations
When considering purchasing a wood router, it’s important to keep in mind your budget and the price range of different models available. Prices can vary widely depending on the brand, type, and size of the router you choose.
A basic entry-level model may cost around $50-$100, while more advanced models with additional features such as variable speed control and electronic feedback can reach up to $300 or more.
Your budget should reflect your needs for the tool. If you’re planning on using a router frequently for larger projects such as doors or countertops made from oak, then investing in a high-quality model may be worth it. However, if you only plan on using a router occasionally for small projects or DIY saw modifications, then a lower-priced model with fewer collets and less ability to adjust the depth may suffice.
Remember that there are many options available within each price range so take some time to research which one will fit your needs best before making any purchases.
As you consider your budget and look at different models within your price range, keep in mind what types of woodworking tasks this versatile tool can accomplish. From trimming edges to creating intricate designs on wood surfaces, a router can be used for many different applications.
In the next section, we’ll explore these various uses in more detail so that you have a better understanding of how this powerful tool can give you greater control over your woodworking projects.
Router Tool Applications
If you’re interested in woodworking projects, carpentry, and cabinetry applications, or routing techniques for joinery and shaping, the router tool is a must-have.
With its versatility and precision, it’s also perfect for sign making and engraving.
But did you know that routers can also be used to route in plastic, metal, and other materials?
Explore all the possibilities with your router tool!
Woodworking projects
You can create beautiful and unique woodworking projects with the help of a wood router, adding a personal touch to your home decor that will leave you feeling proud and accomplished.
A wood router is an essential tool for cutting various shapes, such as circles, curves, and grooves in wood materials. You can use it to make intricate designs in doors or oak countertops to give them a sophisticated look.
Moreover, routers can also be used for small projects like making bases for vases or picture frames. They’re perfect for hinge mortises on cabinet doors or creating decorative edges on tables.
Routers come in multiple sizes and styles allowing you to adjust the depth depending on the material you’re working with. With a little practice and patience, you can create masterpieces that’ll be admired by all who see them!
Now let’s move on to carpentry and cabinetry applications…
Carpentry and cabinetry applications
To get started on carpentry and cabinetry applications, it’s important to know that over 80% of homeowners prefer custom cabinets over pre-made ones. This means there’s a high demand for skilled carpenters and cabinet makers who can create unique pieces tailored to the specific needs and style preferences of their clients.
To achieve this level of customization, you need to have a good understanding of how to use a wood router tool. Here are four key things to keep in mind when using a router for carpentry and cabinetry applications:
- Determine the depth of cut you want before starting your project.
- Use collets that fit the bit shank size for better precision.
- Attach an edge guide or pattern guide for accurate routing along straight edges or curves respectively.
- Use multiple passes for deeper cuts or housing joints.
With these tips in mind, you’ll be well on your way to creating beautiful custom cabinetry and furniture pieces with ease. Next up, we’ll dive into some routing techniques for joinery and shaping, so stay tuned!
Routing techniques for joinery and shaping
So you’ve learned about the various applications of a wood router tool in carpentry and cabinetry. But did you know that this versatile tool can also be used for joinery and shaping? By adjusting the depth of the bit and selecting the appropriate spin direction, you can create precise cuts to make rabbets or smooth edges.
To safely use your router for joinery, it’s important to understand how to control its movement. When making a cut counterclockwise, keep your left hand on the body of the router while holding onto the handle with your right hand. For clockwise cuts, switch hands so that your right hand is on the body and left hand is on the handle. Make sure to always maintain a firm grip on both handles to prevent any accidents.
When shaping wood with a router, start by selecting an appropriate bit based on the desired shape or curve. Adjusting the depth of cut will allow you to achieve different levels of detail and precision. And don’t forget to wear safety goggles and ear protection when working with power tools!
With these techniques in mind, you’ll be able to tackle any joinery or shaping project with ease.
Now let’s move onto another exciting application of wood routers: sign making and engraving.
Sign making and engraving
Get ready to unleash your creativity with the wood router tool as we explore its potential in sign making and engraving. The router is an excellent tool for creating custom signs with precision and ease. With the right bit and technique, you can carve out letters, numbers, symbols, or even intricate designs onto a variety of materials such as wood, plastic, or metal.
One key feature that makes the router ideal for sign making is its ability to swap bits quickly and easily. This allows you to use multiple bits for different effects without having to stop and change tools. Additionally, many routers have an automatic depth adjustment feature that makes it easy to create consistent cuts at the desired depth.
When engraving on flat surfaces like signs, you can also use a template underneath your workpiece or attach one to the underside of your router base for added stability and accuracy.
Now let’s move on to routing in plastic, metal, and other materials without losing momentum!
Routing in plastic, metal, and other materials
Now you can take your sign making and engraving skills to the next level by using the wood router tool. It can create intricate designs in plastics, metals, and other materials with ease. The router can make accurate cuts in one pass, unlike traditional methods that depend on manual labor and precision.
Routers come in two types – plunge and fixed base, which allows you to adjust the depth of cut based on the material being routed. When routing through plastics or metals, it’s notable that some bits may require lubrication to prevent melting or chipping of the material. Others come with diamond-tipped edges that can cut through hard surfaces with ease without any need for lubrication.
Additionally, with a router bit without a guide bearing, you can make multiple passes over a design until it reaches its desired depth. With these techniques under your belt, you’re ready to move onto learning about router tool safety and maintenance.
Router Tool Safety and Maintenance
When it comes to using a router tool, safety should always be your top priority. Essential precautions and guidelines must be followed at all times to prevent accidents and injuries. Proper handling and operation techniques are also crucial in ensuring the best results from your wood router.
In addition, regular maintenance and cleaning routines are necessary for longevity and optimal performance of your tool, while knowing how to troubleshoot common issues can save you time and money in the long run.
Essential safety precautions and guidelines
To ensure your safety when using a wood router, you must always follow the essential guidelines and precautions, which will ultimately protect you from potential hazards. Here are some important points to keep in mind:
- Always wear appropriate protective gear such as goggles, earplugs, and a dust mask to protect yourself from flying debris and loud noise.
- Ensure that your work area is clean and free of clutter before starting any routing project.
- Make sure your router is properly secured in its base and that the bit is tightened securely before turning it on.
In addition to these general guidelines, there are also specific precautions you should take depending on the type of routing project you’re undertaking. For example:
- When working with large pieces of wood or multiple pieces at once, make sure they are well-supported throughout the entire cutting process.
- If working with particularly hard or dense woods, use specialized bits designed for those materials to prevent damage to both the material and the tool.
- Never attempt to reach around or behind a stationary cutter while it’s still spinning – always wait for it to come to a complete stop before making any adjustments.
By taking these simple yet critical safety measures into account whenever using your wood router, you can minimize risks and focus on enjoying your crafting experience.
Proper handling and operation techniques
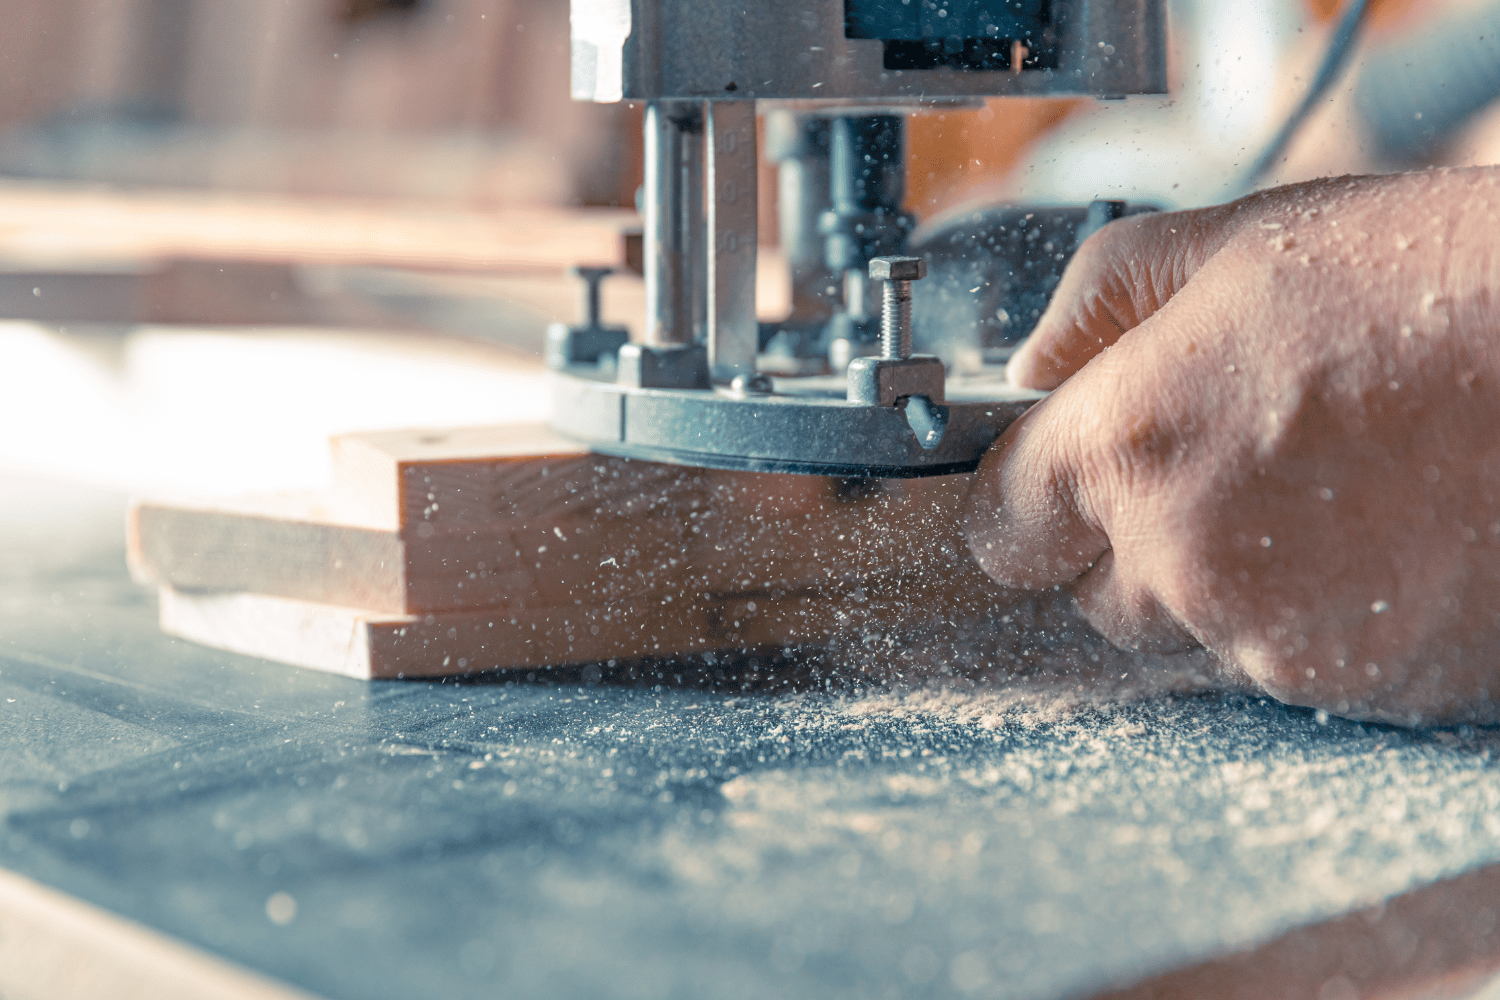
Now that you’ve got the safety protocols under your belt, let’s dive into the proper handling and operation techniques of a wood router tool. As previously mentioned, the wood router is a powerful tool that requires respect and caution while in use.
The first step to mastering its use is to ensure that you have a firm grip on it at all times. This ensures that your hands remain steady while cutting through the wood. Another important aspect of using this tool correctly is to pay attention to the direction of rotation when making cuts.
You always want to move the router against or with the grain of the wood for optimal results. Additionally, make sure you are applying even pressure throughout each cut, as this will help prevent any unwanted deviations or misalignments from occurring.
Now that we’ve covered proper handling and operation techniques, let’s move onto maintenance and cleaning routines for longevity…
Maintenance and cleaning routines for longevity
Ensuring your wood router is properly maintained and cleaned will extend its lifespan and keep it running smoothly for all your future woodworking projects.
After each use, it’s important to clean the tool thoroughly with a soft cloth or brush to remove any sawdust or debris that may have accumulated during operation.
You should also inspect the router’s bits, collets, and bearings regularly for signs of wear or damage. If you notice any issues, replace them immediately to prevent further damage to the tool.
In addition to cleaning and inspecting, regular maintenance is necessary for optimal performance. This includes lubricating the router’s moving parts with oil or grease as recommended by the manufacturer and checking its electrical components periodically.
By taking care of your wood router in these ways, you can avoid common issues like overheating or malfunctioning that can frustrate even the most experienced woodworker.
In the next section, we’ll cover some troubleshooting tips for when things don’t go quite as planned during your woodworking projects.
Troubleshooting common router tool issues
Are you tired of your wood router constantly giving you headaches? Let’s dive into some troubleshooting tips for those common issues that always seem to pop up at the worst possible time.
One issue that many woodworkers face is a dull or broken bit. This can cause uneven cuts or even damage to the material being worked on. Make sure to regularly check your bits for any signs of wear and tear, and replace them as necessary.
Another common problem is overheating, which can cause the router to shut off unexpectedly or even damage the tool itself. To avoid this, make sure your work area is well-ventilated and use a dust collector to keep debris from building up around the motor. If you’re still experiencing issues, it may be worth contacting customer support for further assistance.
Now that you have a better understanding of how to troubleshoot common router tool issues, it’s time to take your skills to the next level with some advanced router techniques.
Advanced Router Techniques
When it comes to advanced router techniques, you can create decorative edges and profiles that’ll make your projects stand out. You can also use router tools for routing dadoes, rabbets, and mortises for joints and other applications.
Template routing and pattern making can help you achieve precise cuts. Jigs and fixtures provide the necessary support for accurate routing.
Creating decorative edges and profiles
To add a touch of elegance to your woodworking projects, you’ll want to learn how to create decorative edges and profiles using a wood router. With the right bit and technique, you can transform plain boards into works of art.
There are many different types of router bits that will help you achieve the desired effect, from round-over bits that round off sharp edges to cove bits that create concave curves. One popular method is to use a Roman ogee bit, which creates an S-shaped profile with a deep groove in the center. Another option is the chamfer bit, which cuts 45-degree angles on the edge of the board for a clean and modern look.
The key is to experiment with different bits and techniques until you find what works best for your project.
Routing dadoes, rabbets, and mortises
Routing dadoes, rabbets, and mortises can elevate your woodworking projects to the next level by creating precise joints and openings for shelves, panels, and other components.
Dadoes are channels cut across the grain of a board that receive another board. Rabbets are channels along the edge or end of a board that allow it to fit into another board. Mortises are recessed slots cut into a piece of wood that receive a tenon from another piece of wood. These three types of cuts can be made with different router bits depending on the depth and width needed.
With practice and precision, you can create strong joints that will last for years. When routing these types of cuts, it’s important to use clamps or other methods to secure your workpiece in place and maintain control over your tool. Take care to make multiple passes if necessary to avoid burning the wood or causing tear-out.
Template routing and pattern making
Now that you know how to route dadoes, rabbets, and mortises, it’s time to take your woodworking skills to the next level with template routing and pattern making. This technique allows you to create identical pieces for a project without having to measure each one individually.
With template routing, you simply attach a piece of wood to the router base and follow the shape of the template using a guide bushing or bearing. This method is perfect for creating curved edges, intricate designs, or repeating patterns. You can even make your own templates out of scrap wood or purchase pre-made ones for more complex shapes.
Template routing gives you complete control over your project while also saving time and energy. As you become more comfortable with template routing and pattern making, you’ll want to ensure precision in every cut. That’s where jigs and fixtures come in handy. These tools hold your workpiece in place during routing so that each cut is consistent and accurate.
Using jigs and fixtures for precision routing
Using jigs and fixtures can greatly enhance your precision when performing routing tasks, which is a key aspect of achieving professional-level woodworking results. These tools help you maintain accuracy and consistency while guiding your workpiece through the router bit.
Jigs and fixtures are especially useful when working with complex shapes or intricate designs that require multiple passes over the same area. One example of a jig is a straight edge guide, which helps you make accurate cuts along a straight line. You simply clamp the guide to your workpiece and run the router along its edge.
A fixture, on the other hand, holds your workpiece in place while allowing you to move it precisely according to predetermined measurements. For instance, if you need to create a series of identical cuts for box joints or dovetails, using a fixture can ensure that each cut is made at exactly the right angle and distance from the previous one.
By understanding how to use jigs and fixtures effectively, you can take your routing skills to new heights and achieve even more impressive results. In addition, there are other ways to enhance your router tool capabilities that go beyond just using these tools alone.
Enhancing Router Tool Capabilities
If you want to enhance your router tool capabilities, there are several options available. First, consider setting up a router table which provides stability and precision for your projects.
Additionally, investing in router accessories and attachments, such as jigs and guides, can help expand the range of cuts you can make. Don’t forget about dust collection and safety accessories to protect yourself and keep your workspace clean.
Finally, upgrading your router bits for specialized applications like joinery or carving can take your woodworking to the next level.
Router table setups and advantages
A router table setup offers numerous advantages, such as increased precision and safety when working with the wood router tool. By mounting your router onto a table, you can control the movement of the wood piece with both hands, allowing for more accuracy in your cuts.
Additionally, having a flat surface to work on eliminates any potential wobbling or instability that may occur when using a handheld router.
To further enhance your routing capabilities with a table setup, consider these two sub-lists:
Enhance versatility:
- Router tables allow for an array of cutting depths and shapes to be achieved by using different bits.
- They also offer the ability to make repeatable cuts easily and quickly.
Improve safety:
- A stable surface reduces the risk of slips or mistakes during use
- The added space allows for more room to maneuver, reducing any chance of injuries from contact with moving parts.
With these benefits in mind, it’s clear why many woodworkers prefer using a router table over handheld options. Now let’s explore how various accessories and attachments can take your routing skills even further.
Router accessories and attachments
Router accessories and attachments can greatly enhance the functionality of your router table. For instance, a featherboard is a must-have accessory that helps keep your workpiece firmly in place during routing operations. This results in more precise cuts and an overall better finish for your woodworking projects.
Another useful attachment to consider is the router guide bushing, which allows you to create accurate and consistent patterns or designs on your workpiece. Moreover, if you frequently work with different types of bits, collets are helpful attachments that enable you to switch between various sizes quickly.
By investing in these accessories, you can take full advantage of what your wood router tool has to offer and achieve professional-level results in no time.
Dust collection and safety accessories
You’ll want to prioritize your safety and keep your workspace clean by investing in dust collection and safety accessories for your woodworking projects. Not only will this protect you from harmful dust particles, but it can also improve the accuracy of your cuts.
Here are some essential dust collection and safety accessories to consider:
- Dust masks or respirators: Protect your lungs from inhaling fine wood particles.
- Eye protection: Keep sawdust out of your eyes with goggles or glasses.
- Dust collectors: Suck up sawdust before it has a chance to settle on surfaces or get breathed in.
By investing in these accessories, you’ll be able to work more efficiently and safely. Plus, keeping your workspace clean means less time spent cleaning up after each project.
Upgrading router bits for specialized applications
Upgrading your router bits can transform your woodworking projects from average to exceptional, and it doesn’t have to cost a fortune. Investing in high-quality router bits that are specifically designed for the task at hand is one of the best decisions you can make as a woodworker.
Specialized bits such as chamfer, cove, beading, and flush trim bits can help you create intricate designs and achieve smooth surfaces with ease. Furthermore, upgrading your router bits means that you’ll be able to work with different types of materials including hardwoods, softwoods, MDF, particleboard and even plastic or metal.
With better control over your cuts thanks to specialized bits, you’ll be able to take on more challenging projects with confidence.
Frequently Asked Questions
What is the maximum thickness of wood that a router tool can cut?
You can cut up to 2 inches of wood with a router tool. Keep in mind that the larger the bit, the less depth it can handle. Make sure to adjust your settings and take your time for best results.
Can a router tool be used to cut metal or plastic materials?
Yes, you can use a router tool to cut metal or plastic materials. However, it’s important to use the appropriate bits and settings for each material to achieve the desired results and avoid damage to the tool.
How do I sharpen the router bit and how often should it be done?
To sharpen your router bit, clamp it in a vise and use a diamond file to hone the cutting edge. Do this whenever you notice decreased performance or dullness, but don’t overdo it as frequent sharpening can shorten the bit’s lifespan.
What is the difference between plunge routers and fixed base routers?
Want to have more control over your woodworking projects? A plunge router is perfect for creating intricate designs and curves, while a fixed base router is better suited for straight cuts. Make your choice based on the project at hand.
Is it safe to use a router tool without eye protection?
No, it’s not safe to use a router tool without eye protection. You risk debris flying into your eyes and causing permanent damage. Always wear protective eyewear to keep yourself in control of the situation.