What is a Belt Sander? – An Ultimate Guide
Welcome to our comprehensive guide on belt sanders, a versatile and indispensable tool for any DIY enthusiast or woodworking enthusiast. Whether you’re a seasoned craftsman or just starting your sanding journey, this article is designed to provide you with all the essential information you need to become a master at using belt sanders effectively and safely.
In this guide, we’ll explore the fundamental aspects of belt sanders, from understanding their various types and components to selecting the right one for your specific projects. We’ll delve into the proper techniques for achieving smooth and precise sanding results on different materials, along with practical tips and tricks to avoid common pitfalls.
Safety is paramount when working with power tools, and we’ll cover essential safety precautions to ensure your well-being while using belt sanders. Moreover, we’ll discuss the importance of maintenance and provide insights into troubleshooting common issues.
Whether you’re looking to enhance your woodworking skills, undertake home improvement projects, or tackle metalworking tasks, our goal is to empower you with the knowledge and confidence to make the most out of your belt sander. So let’s dive in and unlock the full potential of this remarkable tool together!
Introduction to Belt Sanders
A belt sander is a powerful and versatile tool used for sanding and smoothing various materials, making it an essential asset in the toolkit of woodworking enthusiasts, DIYers, and professionals alike. This tool is designed to take on large surface areas and rough materials with ease, transforming them into polished and refined finishes.
Definition and Purpose
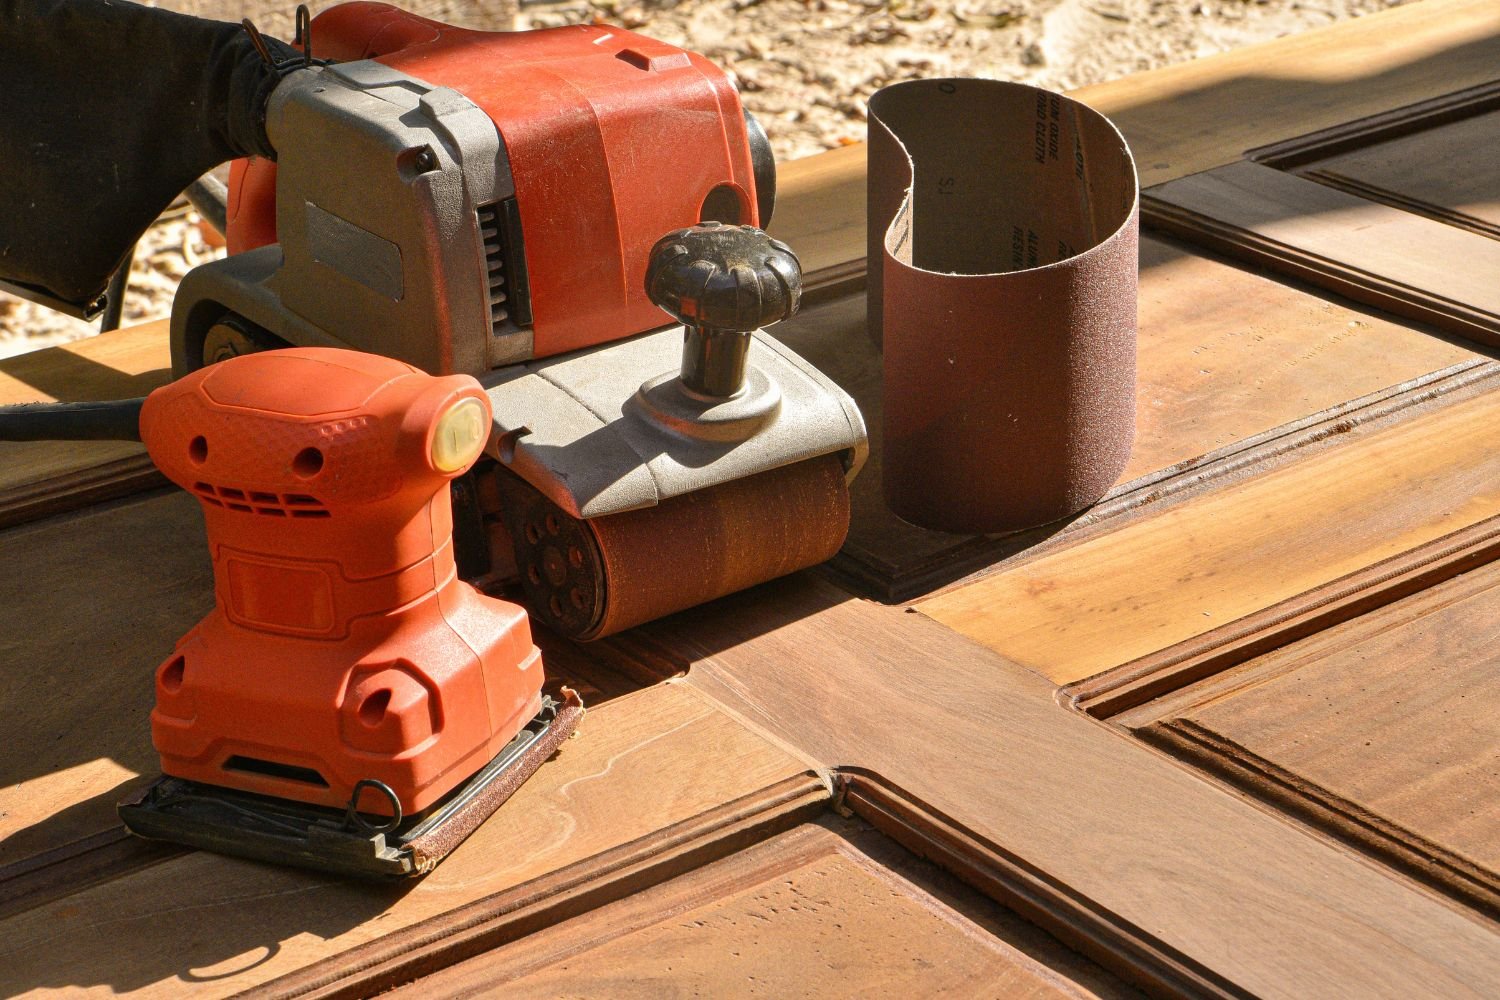
At its core, a belt sander consists of an electric motor that drives a continuous loop of abrasive sandpaper, known as the sanding belt. The sanding belt is stretched over two parallel drums or rollers, creating a flat sanding surface. When the motor is activated, the sanding belt rotates rapidly, enabling it to abrade the surface of the material it comes into contact with.
The primary purpose of a belt sander is to remove material efficiently and quickly, making it particularly valuable for heavy-duty tasks like leveling, smoothing rough surfaces, and removing stubborn finishes or coatings. Its robust sanding action can significantly speed up the sanding process, saving valuable time and effort.
Types of Belt Sanders
Belt sanders come in various types, each tailored to specific applications and user preferences. The two main categories are:
Handheld Belt Sanders: These portable and compact belt sanders are commonly used for smaller projects and tasks that require mobility and precision. They are ideal for shaping and finishing wood, working on furniture, and tackling intricate details.
Stationary Belt Sanders: Also known as benchtop belt sanders, these larger and more powerful sanders are designed for heavy-duty sanding tasks and larger workpieces. They are commonly found in workshops and are excellent for smoothing and squaring edges, as well as preparing surfaces for finishing.
Advantages and Applications
Belt sanders offer several advantages that make them stand out among other sanding tools:
High Material Removal Rate: Their rapid sanding speed allows for quick material removal, making them highly efficient for large projects or when time is of the essence.
Versatility: Belt sanders can work on various materials, including wood, metal, plastic, and more, making them indispensable for multiple applications.
Easy to Use: While caution is necessary, belt sanders are generally straightforward to operate, making them accessible to both beginners and experienced users.
Uniform Sanding: The continuous belt ensures even sanding across the entire workpiece, resulting in a smooth and consistent finish.
These advantages enable belt sanders to find applications in a wide range of tasks, such as woodworking, metalworking, home improvement, and even auto body repair. Whether you need to shape a piece of furniture, prepare a wooden floor for refinishing, or remove paint from metal surfaces, a belt sander can be your go-to tool for achieving professional-grade results.

Understanding Belt Sanders
To harness the full potential of a belt sander, it’s crucial to have a comprehensive understanding of its key components, the various belt grits, and the necessary safety precautions to ensure smooth and secure operation.
Components and Parts
A typical belt sander consists of the following essential components and parts:
Motor: The heart of the belt sander, the motor powers the rotation of the sanding belt. It’s important to consider the motor’s power rating, as it directly impacts the tool’s efficiency and performance.
Sanding Belt: The sanding belt is a continuous loop of abrasive material that wraps around the sander’s two rollers or drums. It comes in various lengths and widths, offering flexibility for different projects.
Tracking Adjustment: Belt sanders often feature a tracking adjustment knob or mechanism. This allows you to keep the sanding belt centered and aligned during operation, ensuring even and precise sanding.
Dust Collection System: Many modern belt sanders come equipped with a dust collection system to capture and contain the fine dust produced during sanding. This not only keeps the work area clean but also improves visibility and prevents respiratory issues.
Different Belt Grits and Their Uses
Sanding belts are available in a range of grits, each serving a specific purpose:
Coarse Grits (Low Grit Numbers): Coarse grits, typically ranging from 40 to 80, are suitable for heavy material removal and leveling uneven surfaces. They are ideal for initial sanding on rough materials or when you need to remove paint, varnish, or deep scratches.
Medium Grits (Medium Grit Numbers): Medium grits, typically ranging from 100 to 150, strike a balance between material removal and surface smoothing. They are commonly used for general sanding and preparing surfaces for finishing.
Fine Grits (High Grit Numbers): Fine grits, usually ranging from 180 to 220 or higher, excel at providing a smooth and polished finish. They are ideal for final sanding and achieving a refined surface ready for staining, painting, or coating.
Choosing the right grit depends on the project’s requirements, the material you’re working on, and the level of finish you aim to achieve.
Safety Precautions
Working with a belt sander requires adherence to crucial safety precautions to protect yourself and others:
Personal Protective Equipment (PPE): Always wear safety goggles or a face shield to shield your eyes from flying debris, and use hearing protection to dampen the noise produced by the sander. Additionally, a dust mask or respirator is essential to prevent inhaling fine dust particles.
Work Area Setup: Clear your work area of any obstacles or clutter to ensure safe and unobstructed operation. Securely fasten your workpiece before sanding to prevent slippage.
Operational Safety Guidelines: Avoid applying excessive pressure on the sander, as it can lead to uneven sanding or damage the tool. Instead, let the sander’s weight and motor power do the work. Always keep your hands away from the sanding area and turn off the sander before adjusting or changing the sanding belt.
By understanding the components, selecting the right grit, and observing the necessary safety precautions, you’ll be well-prepared to utilize a belt sander effectively and confidently in your woodworking and DIY projects.
Choosing the Right Belt Sander
Selecting the appropriate belt sander is paramount to ensure the success and efficiency of your sanding projects. To make an informed decision, consider the specific requirements of your project, the types of tasks you’ll be undertaking, and the essential features that align with your needs.
Assessing Project Requirements
Before diving into the wide array of belt sanders available, take the time to assess your project requirements:
Project Size and Scope: Consider the scale of your projects. For larger or more extensive tasks, a stationary belt sander with a wider belt may be more suitable, as it can cover more significant surface areas efficiently. Conversely, for smaller, intricate projects, a handheld belt sander might be the better choice due to its maneuverability.
Material Type: Determine the materials you’ll be working with most frequently. Different belt sanders excel in sanding specific materials. For instance, woodworking projects may require a sander with varying belt grits to achieve the desired smoothness, while metalworking projects may benefit from a sander with higher motor power for efficient material removal.
Frequency of Use: Evaluate how often you’ll be using the belt sander. If you’re an occasional DIYer, a moderately priced model may suffice. However, for professionals or avid hobbyists, investing in a high-quality, durable sander with robust features can be a wise decision.
Types of Projects Suitable for Belt Sanders
Belt sanders are incredibly versatile and find application in a wide range of projects, including:
Woodworking Projects: Belt sanders are a woodworker’s best friend when it comes to smoothing surfaces, removing old finishes, and achieving precise shaping. Whether it’s preparing a wooden floor for refinishing or creating smooth edges on furniture pieces, a belt sander is a valuable tool in any woodworking shop.
Metalworking Projects: When dealing with metal surfaces, such as removing rust, burrs, or weld seams, a belt sander with appropriate grits and motor power can significantly speed up the process and yield excellent results.
Home Improvement and DIY Projects: Belt sanders prove indispensable in various home improvement tasks, such as sanding doors, cabinets, decks, or even repairing furniture. They help achieve a professional finish without the need for excessive manual effort. An orbital sander can be used in conjunction for a smooth, professional finish.
Key Features to Consider
When exploring different belt sander models, pay attention to the following key features:
Motor Power and Speed: A higher motor power and variable speed settings allow you to tackle diverse projects with ease, from heavy material removal to fine finishing work.
Belt Size: The size of the sanding belt determines the sander’s coverage area. Consider the width and length of the belts that will be most useful for your projects.
Dust Collection Efficiency: An efficient dust collection system keeps your work area cleaner and minimizes airborne dust particles, promoting better visibility and a healthier work environment.
Ergonomics and Handling: Opt for a belt sander with comfortable grip handles and ergonomic design to reduce fatigue during extended sanding sessions.
By carefully assessing your project requirements, understanding the types of tasks suitable for belt sanders, and considering essential features, you can confidently choose the right belt sander that perfectly aligns with your needs and empowers you to achieve exceptional sanding results.

Using Belt Sanders Effectively
To achieve professional and polished results with your belt sander, mastering the proper setup, employing effective sanding techniques, and understanding how to handle different materials are crucial aspects. Additionally, being aware of common mistakes and how to avoid them will ensure smooth and successful sanding projects.
Setting Up the Belt Sander
Before diving into the sanding process, ensure your belt sander is correctly set up:
Installing and Adjusting the Sanding Belt: Follow the manufacturer’s instructions to install the sanding belt securely and properly. Ensure the belt is aligned and centered on the rollers for even sanding.
Ensuring Proper Tracking: Adjust the tracking of the sanding belt to prevent it from slipping off or running to one side during operation. A well-tracked belt ensures uniform sanding across the workpiece.
Sanding Techniques
Employing the right sanding techniques is key to achieving smooth and precise results:
Surface Preparation: If the material is particularly rough or has imperfections, start with a coarse grit sanding belt to remove excess material. Gradually work your way to finer grits for a smoother finish.
Edge Sanding: For sanding edges and corners, use the edge of the sanding belt, applying light and consistent pressure to avoid over-sanding or creating uneven surfaces.
Smoothing and Leveling: Move the sander in the direction of the grain for a more uniform and even finish. Avoid excessive pressure, as it may cause dips or uneven surfaces.
Removing Paint and Varnish: When removing paint or varnish from surfaces, opt for a coarse grit initially to strip away the old finish. Switch to finer grits as you approach the bare surface to achieve a clean and smooth result.
Tips for Sanding Various Materials
Different materials require specific approaches for optimal sanding:
Wood: Use a medium to fine grit sanding belt for most wood sanding tasks. Pay attention to the wood’s grain direction and avoid cross-grain sanding, as it can lead to scratches and blemishes.
Metal: When sanding metal, use a belt sander with lower speeds to prevent overheating and avoid damaging the surface. Start with a coarse grit to remove burrs or welds and switch to finer grits for a polished finish.
Plastic: Be cautious when sanding plastic, as it can melt or deform easily. Use light pressure and finer grits to prevent damage and achieve a smooth finish.
Avoiding Common Mistakes
To ensure a successful sanding experience, be mindful of these common mistakes:
Over-Sanding: Applying excessive pressure or spending too much time in one area can cause uneven surfaces and damage the material.
Neglecting Dust Collection: Failing to use the dust collection system can lead to a messy work area and potential health risks from inhaling airborne particles.
Ignoring Safety Precautions: Always wear appropriate personal protective equipment (PPE) and adhere to safety guidelines to prevent accidents and injuries.
By following proper setup procedures, employing effective sanding techniques, understanding material-specific tips, and avoiding common mistakes, you’ll make the most out of your belt sander and achieve flawless results in your sanding projects.
Maintenance and Care
Proper maintenance and care are essential to keep your belt sander running smoothly and effectively. Regular cleaning, lubrication, and timely belt changes will not only prolong the life of your tool but also ensure consistent and high-quality sanding results.
Cleaning the Belt Sander
Cleaning your belt sander after each use is vital to prevent dust and debris buildup, which can impede its performance. Here’s how to clean your belt sander effectively:
Disconnect the Power: Before cleaning, always disconnect the power cord to avoid accidental activation.
Remove Dust and Debris: Use a brush or compressed air to clean the sanding belt, rollers, and surrounding areas. Pay special attention to the dust collection system and ensure it’s clear of clogs.
Clean the Housing: Wipe down the sander’s housing with a clean, dry cloth to remove any dust or residue.
Lubrication and Inspection
Periodic lubrication and inspection of your belt sander are crucial to maintain its smooth operation and detect any potential issues early on:
Lubrication: Check the manufacturer’s recommendations for lubrication points and apply the appropriate lubricant to keep moving parts functioning smoothly.
Bearing Inspection: Regularly inspect the sander’s bearings for signs of wear or damage. If you notice any issues, consult the user manual or seek professional assistance for replacement.
Belt Tension: Ensure the sanding belt is properly tensioned to prevent slippage during use. Adjust the tension according to the manufacturer’s guidelines.
Changing Sanding Belts
Regularly changing the sanding belt is essential to maintain optimal sanding performance. Follow these steps to safely and efficiently change the sanding belt:
Power Off: Before changing the belt, ensure the sander is unplugged to avoid accidental activation.
Release Tension: Use the tension release lever (if available) to loosen the tension on the sanding belt, making it easier to remove.
Remove the Old Belt: Slide the old belt off the rollers and discard it appropriately.
Install the New Belt: Align the new sanding belt properly over the rollers, ensuring it’s centered and straight. Tighten the tension as per the manufacturer’s instructions.
Storage and Transportation
Proper storage and transportation are essential to safeguard your belt sander and prevent damage:
Store in a Dry Location: Keep your belt sander in a dry, sheltered area to protect it from moisture and humidity, which can lead to corrosion.
Secure the Power Cord: To avoid damage to the power cord, loop it properly and secure it with a cable tie or cord wrap.
Protective Case or Bag: If possible, store your belt sander in a dedicated protective case or bag to shield it from dust and impacts during transportation.
By following these maintenance and care practices, you’ll ensure that your belt sander remains in top condition, ready to tackle any sanding task with efficiency and precision.

Upgrading and Customizing Belt Sanders
Taking your belt sander to the next level involves exploring various accessories and do-it-yourself (DIY) enhancements. These additions can enhance the versatility and performance of your tool, making it even more efficient for your specific projects. Let’s delve into the world of belt sander upgrades and customization.
Accessory Options
Several accessories are available in the market to augment your belt sander’s capabilities. Consider the following popular options:
Dust Collection Attachments: Upgrading your belt sander with a more efficient sawdust collection vacuum attachment can significantly improve the cleanliness of your work area. Look for accessories that offer better dust containment, allowing you to work in a cleaner and healthier environment.
Miter Gauges and Guides: Adding a miter gauge or guide allows you to achieve precise angles and straight cuts during sanding. This is especially useful for projects that require precise and consistent sanding at specific angles.
Table Extensions: For larger projects or increased stability, invest in table extensions that provide a larger sanding surface. This is particularly beneficial when working with oversized or heavy workpieces.
DIY Enhancements
Customizing your belt sander with DIY enhancements is an excellent way to tailor it to your specific needs. Here are some popular DIY upgrades:
Building a Sanding Table: Constructing a sanding table or platform can transform your handheld belt sander into a stationary sanding station. This DIY enhancement provides more stability and control, making it easier to sand smaller pieces and achieve smoother results.
Customizing Sanding Belts: You can create custom sanding belts by cutting larger belts to different sizes to fit your specific project requirements. Additionally, you can experiment with different grit combinations to achieve unique sanding effects.
Sturdy Base and Stand: Building a sturdy base or stand for your benchtop belt sander enhances stability and reduces vibration during use. This DIY upgrade helps to improve the quality of your sanding work.
Safety Considerations
While upgrading and customizing your belt sander can bring significant benefits, always prioritize safety:
Follow Manufacturer Guidelines: When adding accessories or making DIY enhancements, ensure they are compatible with your specific belt sander model and follow the manufacturer’s guidelines.
Stability and Secure Attachments: Ensure that any additional accessories or DIY enhancements are securely attached to the belt sander, reducing the risk of accidents during operation.
Regular Inspections: Regularly inspect your customized belt sander for any signs of wear, damage, or loose components. Address any issues promptly to maintain safe operation.
By exploring various accessory options and carefully implementing DIY enhancements, you can tailor your belt sander to suit your unique sanding needs. However, always prioritize safety and adhere to manufacturer guidelines to ensure optimal performance and safeguard your well-being during sanding projects.
Troubleshooting Belt Sander Issues
Even the most reliable belt sanders can encounter issues from time to time. Understanding common problems and their causes, as well as knowing how to troubleshoot and resolve them, is essential to keep your belt sander running smoothly and effectively.
Common Problems and Causes
Belt Slippage: If your sanding belt keeps slipping off the rollers, it may be due to improper tracking or a worn-out belt. Misaligned rollers or an over-tensioned belt can also cause this issue.
Uneven Sanding: Uneven sanding results can be caused by various factors, including incorrect belt tension, uneven workpiece surfaces, or applying too much pressure on one side of the sander.
Sanding Belt Breakage: Sanding belts can break prematurely if they are too tight or if they are exposed to excessive heat and friction during use.
Overheating and Motor Problems: If your belt sander gets too hot or the motor starts to malfunction, it may indicate a problem with the motor or a lack of proper ventilation for heat dissipation.
Solutions for Belt Tracking Issues
To resolve belt tracking issues and ensure smooth operation, follow these steps:
Adjust Tracking: Use the tracking adjustment knob or mechanism to center the sanding belt on the rollers. Make incremental adjustments until the belt runs straight and stays aligned during operation.
Check Tension: Ensure the belt is appropriately tensioned. An overly tight belt can cause premature wear and breakage, while a loose belt can slip off the rollers. Refer to the user manual for the correct tensioning procedure.
Inspect Rollers: Check the rollers for any signs of damage or misalignment. Damaged or worn rollers can lead to tracking issues. If necessary, replace the rollers following the manufacturer’s recommendations.
Overheating and Motor Problems
To address overheating and motor problems, take the following steps:
Reduce Load: Avoid excessive pressure on the sanding surface, as it can overwork the motor and lead to overheating. Let the sander’s weight and the abrasive grit do the work.
Cooling Breaks: During extended use, take short breaks to allow the motor to cool down. Overheating can damage the motor and affect its performance.
Ensure Proper Ventilation: Check for any obstructions around the motor and air vents. Proper ventilation is crucial to prevent overheating. Keep the sander clean and free from dust and debris that can obstruct airflow.
Professional Inspection: If the motor problems persist, seek professional assistance. Attempting to repair or modify the motor yourself may void the warranty or lead to further damage.
By understanding and troubleshooting common belt sander issues, you can keep your tool in optimal condition and achieve consistent, high-quality sanding results. Regular maintenance and proper operation will ensure the longevity and efficiency of your belt sander for many successful sanding projects to come.
Safety and Health Considerations
Working with a belt sander requires careful attention to safety and health practices to protect both yourself and others in the work environment. From proper dust collection and air filtration to using appropriate personal protective equipment (PPE), implementing these safety measures is crucial to ensure a safe and healthy sanding experience.
Dust Collection and Air Filtration
Dust collection is a critical aspect of using a belt sander, as the sanding process generates fine dust particles that can pose health hazards and create a messy work area. Follow these guidelines to manage dust effectively:
Dust Collection System: Ensure your belt sander is equipped with a dust collection system, either integrated or as an accessory attachment. This system helps capture and contain the dust produced during sanding, keeping your work area cleaner and reducing the risk of inhaling airborne particles.
Regular Maintenance: Regularly inspect and clean the dust collection system to ensure optimal performance. Empty the dust collection bag or container promptly and replace filters as needed.
Work in Well-Ventilated Areas: Whenever possible, work in a well-ventilated area, such as a workshop with good airflow. Open doors and windows or use fans to facilitate air circulation.
Hearing Protection
The noise produced by a belt sander can reach high decibel levels, which may cause hearing damage over time. Protect your hearing with the following measures:
Wear Hearing Protection: Always use earplugs or earmuffs designed for noise reduction when operating the belt sander. Hearing protection can significantly reduce the risk of hearing loss.
Limit Exposure Time: If working in noisy environments for extended periods, take short breaks away from the noise to give your ears a rest.
Respiratory Safety
Sanding creates fine dust that can be harmful when inhaled. Protect your respiratory health with these precautions:
Use a Dust Mask or Respirator: Wear a dust mask or respirator that is rated for fine dust protection. This will prevent the inhalation of harmful particles during sanding.
Change Filters Regularly: If your dust mask or respirator has replaceable filters, follow the manufacturer’s recommendations for filter replacement frequency.
Ergonomics and Injury Prevention
Proper ergonomics and injury prevention measures are crucial to avoid strain and injuries while using a belt sander:
Maintain Good Posture: Stand in a balanced position with your feet shoulder-width apart and maintain good posture while operating the sander. Avoid bending or overreaching to reduce the risk of strain.
Use Both Hands: When operating the belt sander, use both hands to maintain better control and balance. This will help prevent accidental slips and injuries.
Take Breaks: Give yourself regular breaks during extended sanding sessions to prevent fatigue and minimize the risk of repetitive stress injuries.
By prioritizing safety and health considerations, you can create a safer work environment and minimize potential risks associated with using a belt sander. Proper dust collection, hearing protection, respiratory safety, and ergonomic practices will enable you to focus on achieving exceptional sanding results without compromising your well-being.
Final Thoughts
The belt sander proves to be a versatile and indispensable tool for woodworking enthusiasts, DIYers, and professionals alike. Throughout this comprehensive guide, we have explored the various facets of belt sanders, from understanding their components and types to mastering effective sanding techniques and troubleshooting common issues.
By choosing the right belt sander for your projects, considering the material type, and understanding the importance of key features, you can ensure that your sanding tasks are executed efficiently and with excellent results. Proper maintenance and care, including regular cleaning, lubrication, and timely belt changes, will keep your belt sander in top-notch condition for years to come.
Additionally, we have emphasized the significance of safety and health considerations while using a belt sander. From dust collection and air filtration to wearing appropriate personal protective equipment, implementing these safety measures is essential to protect yourself and create a healthy work environment.
Whether you are a seasoned craftsman or a beginner looking to hone your sanding skills, the knowledge and insights shared in this guide will empower you to make the most out of your belt sander. From woodworking projects to metalworking tasks and DIY endeavors, the belt sander remains an invaluable companion, assisting you in achieving professional-grade finishes and transforming raw materials into polished works of art.
As you embark on your sanding journey, remember to embrace the art of sanding, where precision, care, and attention to detail result in remarkable creations. Always prioritize safety, practice proper techniques, and unleash the full potential of your belt sander to elevate your craftsmanship and take your projects to new heights.